My Data - Participant Data Screen
Last updated: September 30, 2025
This article will cover the creation and configuration of Study Cards which are displayed on the My Data screen of the Chloe Mobile App.
Participants can access the My Data screen by clicking on the icon second from right on the lower section of the home screen.

The My Data page displays to the participant information gathered from their wearable device(s) during the course of a study, and other relevant study data. Data is displayed on Cards, which can present it in a variety of ways. You can add numerous cards to your participants My Data page, displaying data in a way that is interesting and useful to them and the study.
Creating and configuring Study Cards is a fairly straightforward process
Create a new card, then select the type of card you wish to use from a dialog box.
Configure the card using the properties tab on the right hand side of the screen.
Conversely, you can select an existing card to configure or modify.
Creation and configuration of Study Cards for the My Data screen is done in the My Data Screens study tab within the Chloe Web App.
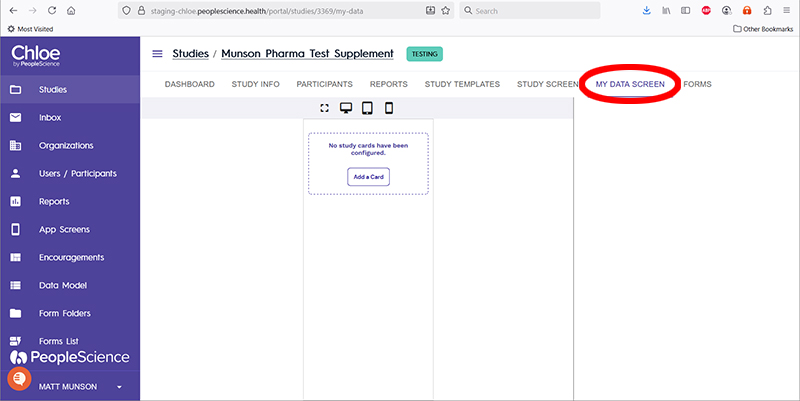
1. Create Your First Study Card
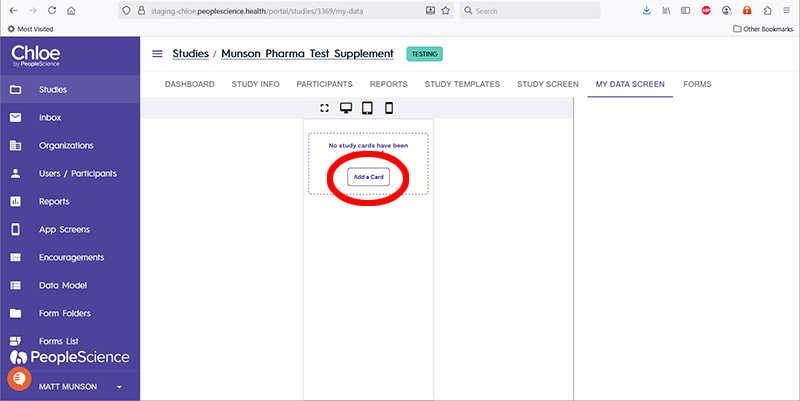
Click the "Add a Card" button in the center of the screen to create your first Study Card.
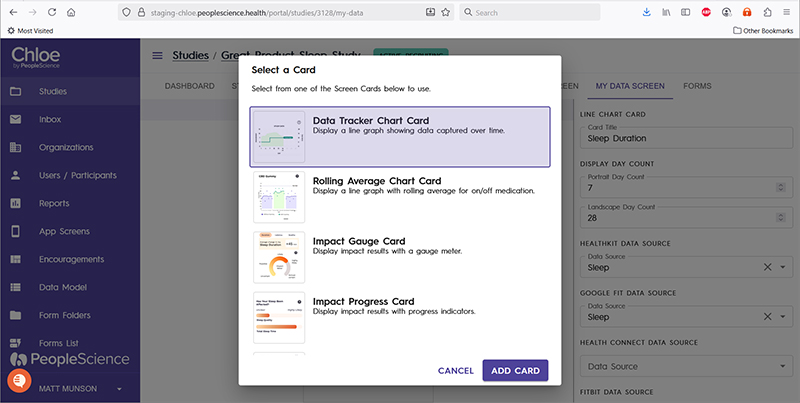
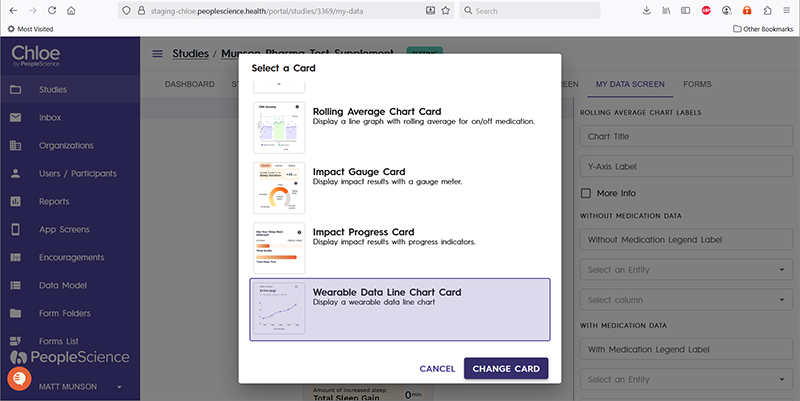
This will open a dialog box where you can choose from a list of Study Card styles.

Select a Study Card from the list, then click the "Add Card" button in the lower right hand corner.
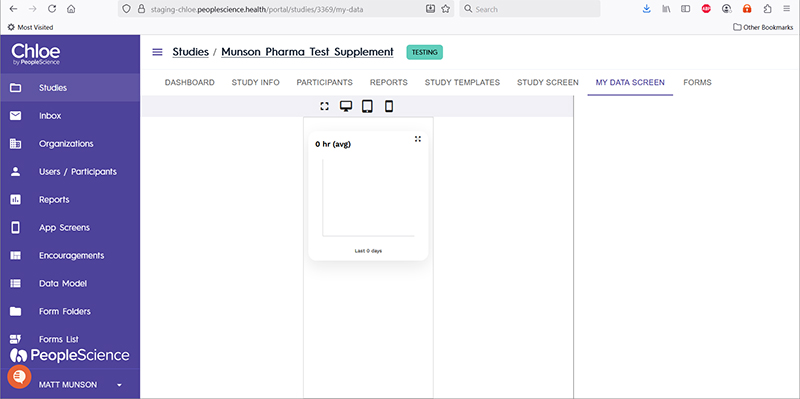
A new card is now added to the stack of cards on the My Data Screen page. In this example, we have added a "Wearable Data Line Chart Card" which must now be configured.
Select the card you wish to configure by clicking on it, then use the Properties Tab (outlined in red) on the right hand side of the screen to create or modify card settings. Configuration of a Study Card is covered in Section 2 of this article.

1a. Add A New Study Card to The Stack
If you have already created cards for your study, but want to add more, the process is slightly different than creating your first.
Select an existing Study Card to activate the pop-up menu. Click the "+" button, next to the "Add Component Below" label.
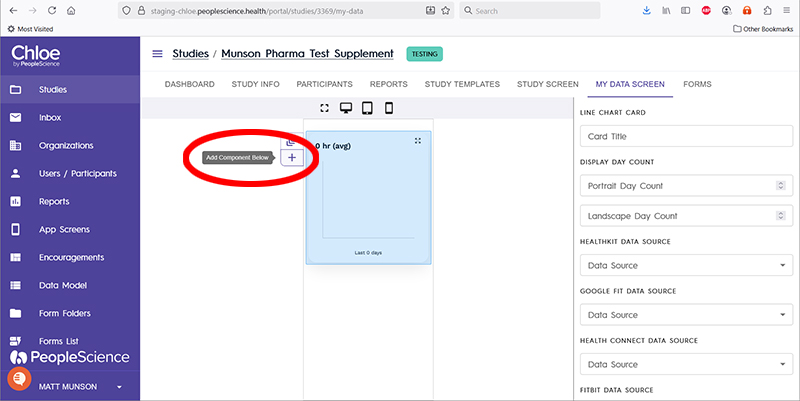
The rest of the process is identical for adding a new card, with the only difference being at the end of the process, where you have the ability to reposition the Study Cards on the stack, using up and down arrows which now appear on the pop-up of a selected card.
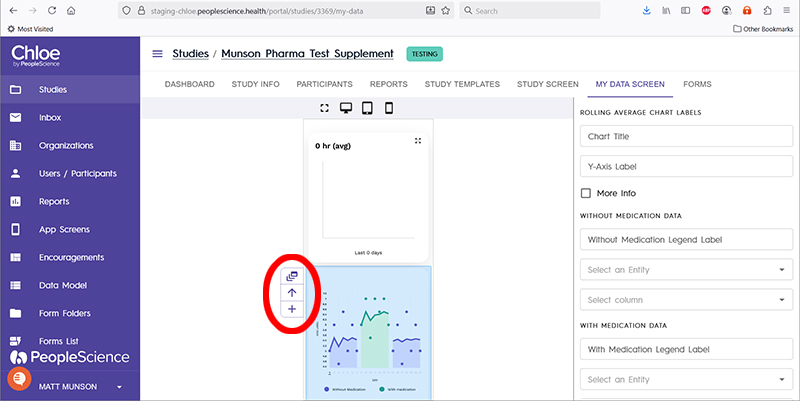
This is how the stack appears after pressing the "up" arrow on the flyout menu pictured above:

2. Change an Existing Study Card
Chloe gives you the ability to swap out one study card type for another, while maintaining your stack order.
Select the card you wish you replace, which activates the flyout menu. Select Change Component item from the top of the flyout, represented by an icon of three cards stacked on top of each other.

Once clicked, you will be presented with the same list of cards that you saw earlier, when creating or adding a card to the Study Screen stack. Select the desired card from the list, click the Change Card button, and your new card will replace the previously selected one.
3. Configure a Study Card
Once a card has been created, it must be configured to show the desired data to your participant.
Select a Study Card for configuration by clicking on it. The card in your stack that has been selected will be highlighted in blue, and the Configuration Tab on the right hand side of the screen will be populated with options specific to the selected Card. These options can now be configured, modified and updated.
Below is a list of guides for configuring each of the Study Card types. Though all of the cards share similarities, each has its own unique configuration options.
// Section Under Construction
Data Tracker Chart Card
Rolling Average Chart Card
Impact Gauge Card
Impact Progress Card
Wearable Data Line Chart Card
4. Delete A Study Card
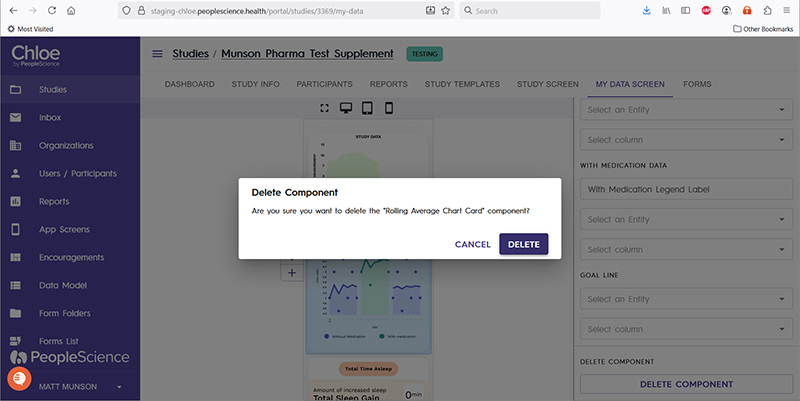
If for some reason you need to remove a Study Card from your stack, select the card to be deleted, then find the "Delete Component" button at the bottom of the Configuration Tab. You may need to scroll down to see it. Press the "Delete Component" button...
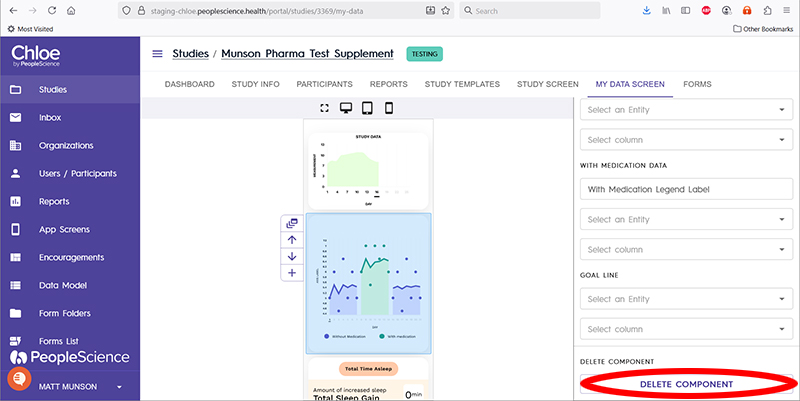
then press "DELETE" to confirm that you wish to delete it, and your card will be removed from your study, and any configuration data will be lost.
5. Test and Validate Your Study Card Configurations
The final step in this process is to test your Study Cards by creating a test participant, generating some data for them, then validating that the data is propagating through to the Study Cards in the My Data section of the Chloe mobile app.