Form Element - Actions
Last updated: July 8, 2026
When building forms and using Form Elements, each element type has a few configuration settings that are common to all Elements. Actions is one of them.
There are three different actions available: Assign, Assign Form Action, and Send Email Action.
Pro-Tip: Actions are a powerful way to add functionality to your Form. Actions are executed once the participant interacts with the Form Element, e.g. they input a response to the question.
Actions can be found near the bottom of the configuration pane of the selected Element.
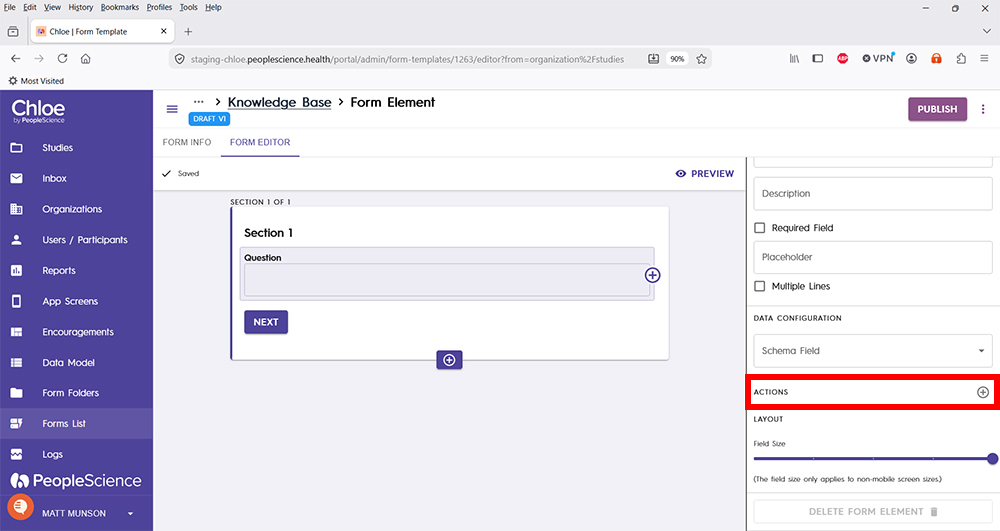
To create an action, click the "+" button on the right hand side of the Actions pane. Then select from the dialog box which type of Action you would like to add to this Form Element.
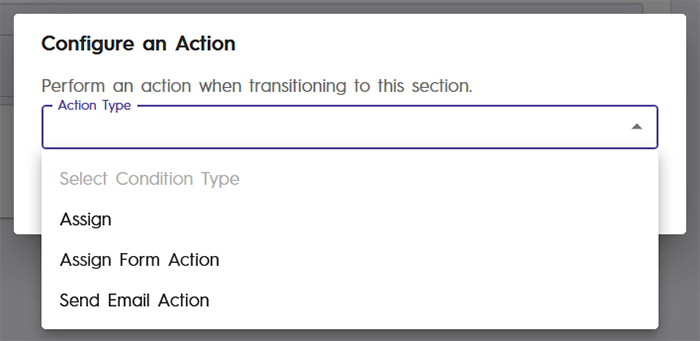
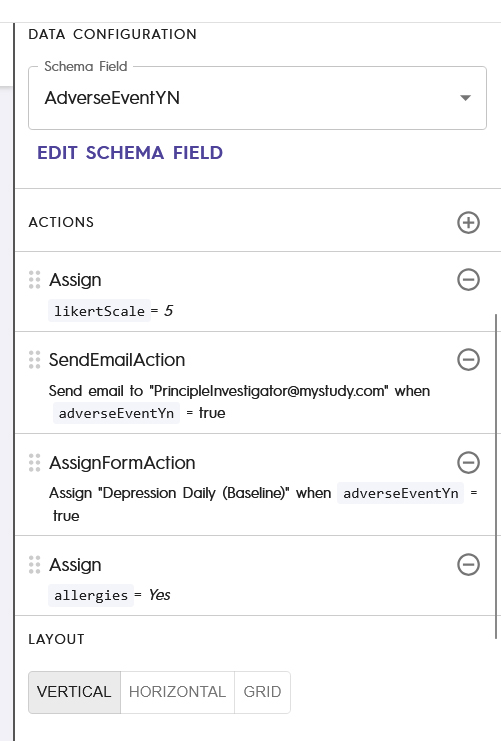
Good To Know: You can create multiple actions for each Form Element in a section. They will be executed in linear order, from top to bottom.
Assign:
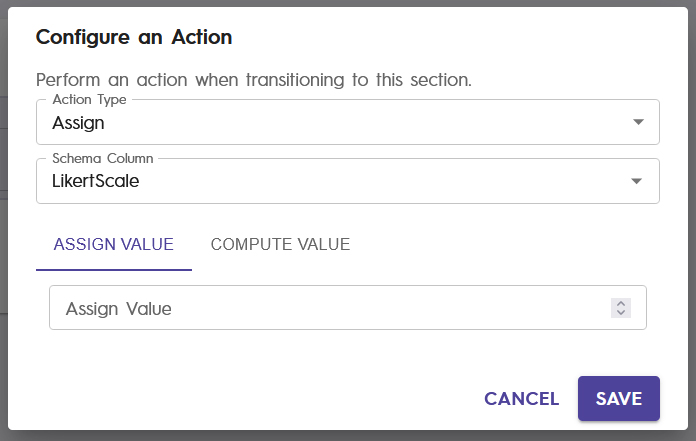
Use this function to assign a value to a Chloe Schema Field. Select from the drop-down of available Schema Fields the one you want to assign a value to, then either assign an explicit value to the Field, or calculate one.
In this first image, we have selected "LikertScale" as our Schema Field to accept a new value, which we will manually type into the field named Assign Value. Be sure to match your variable types. Do not try to assign a text value into a numeric Schema Field, for example.
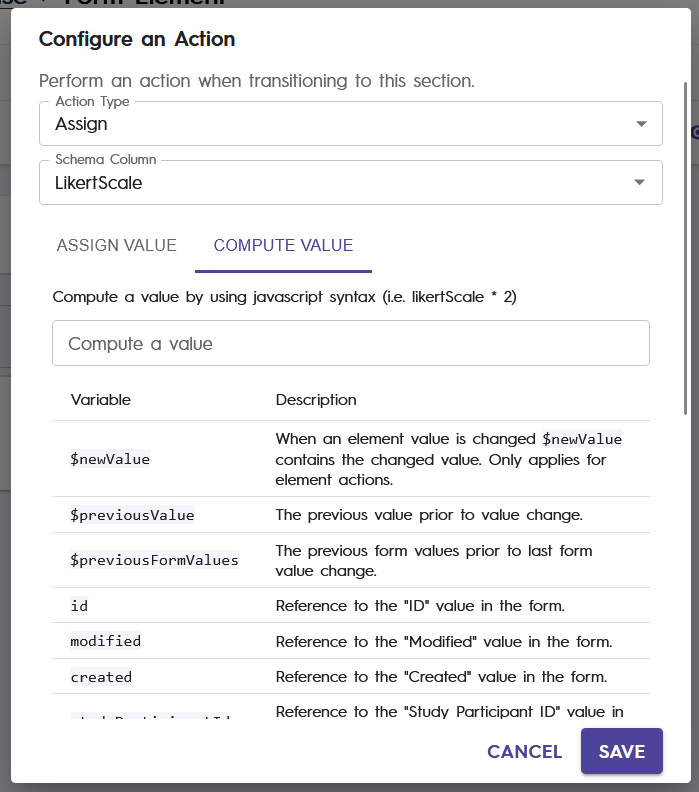
In the following example, we have chosen the Compute Value option, which lets us use arithmetic or logic to dynamically calculate a value using variables available in our study or forms. To aid in the process, Chloe displays a list of available variables and their names. You can copy and paste variable names from that list directly into the Compute a Value field to help reduce errors.
Assign Form Action:
Use this function to assign a Form from your study's Form Library to a participant.
Form Name is the text that will be displayed on the participant mobile or web app. Best practice is to match the text that is used in a Study Template to assign this form under normal circumstances. If the form to be assigned is only used as the result of an Action, be sure to give it a meaningful name that will make sense to the participant when they see it.
From the Select a From to Assign drop down, find the Form from the list of available ones that you wish to assign to the participant.
Calculate Notification allows you to delay the time that the form will be displayed to the user in the app. Use the Time to Notification (minutes) field to specify how far in the future you wish to display the form.
Days Until Event Expires serves the same function as a Study Template does, where you can define how many days that form will appear on the participants Today page before it disappears.

Good to Know: If you are configuring an action and change your mind on what type of action you want, you can change the action type by selecting from the Action Type drop-down at the top of the dialog box.
Send Email Action:
Use this function to send an email. An Action issued Email can be sent to either the Study Coordinators of the study, or a custom defined email address.
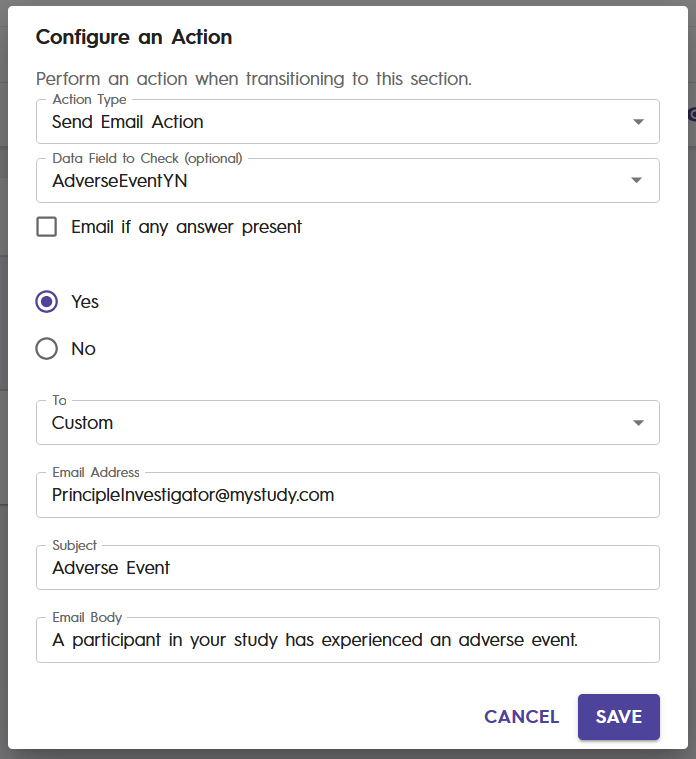
Using the Data Field to Check drop down, you can select a specific schema field and define what field value will trigger this event. For example, if you had a question in the field that asked if the participant had experienced an Adverse Event, we can check here if they answered yes, and then send the email accordingly. If they answered no, the email will not be sent.

In this example, we are going to send the email no matter what, once this form element completes its execution.
The To dropdown lets you specify whether to send to a custom defined email address, or Study Coordinators.
Subject and Email Body are custom fields that you can fill out to suit the needs of your study.
Below is another example configuration of a Send Email Action, in which we check the value of a variable. If the participant had answered Yes to the Adverse Event question, we are going to send an email to the PI for the study.
Here is an example where multiple actions have been configured for this Form Element. You can change the order of execution by dragging and dropping each line item up or down in the queue. Recall that actions are executed in linear order from top to bottom.
Good to Know: You can delete an action after it has been crated by clicking the "-" button on the right hand side of the action.