Participant List Filtering
Last updated: July 11, 2026
The Participants tab of your study gives you a live list of everyone in your study. As that list grows, filters are the fastest way to focus on exactly the participants you care about — for example, everyone who consented but hasn’t enrolled, anyone whose compliance has dropped recently, or the group finishing up in the next few weeks. Filters can be combined, and they also control what appears when you export the list.
This article covers:
• How to open the filters panel
• The Participant Type filter that is applied by default
• Filtering by enrollment status, compliance, projected end date, and invite status
• Combining more than one filter at a time
• Choosing which table columns appear — and how filters shape your export
• Clearing your filters
1. Participants List Overview
For any study, the Participants tab will display (in the absence of any filters being applied) a list of every participant in the study. This is the default setting.
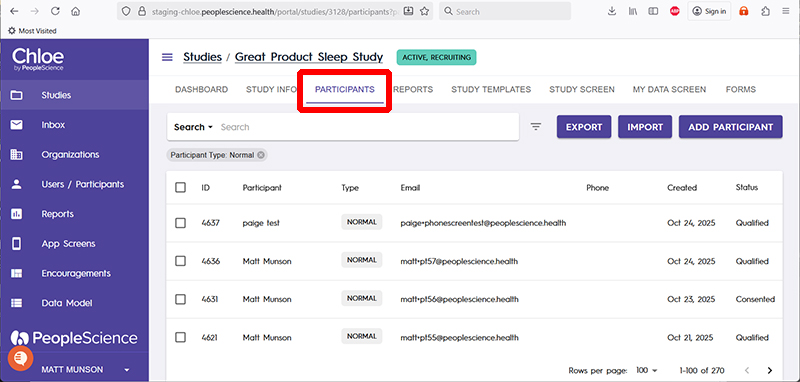
For a detailed description of each of the columns in the participants list, please see this article: 📄 Participants List Columns Defined
Opening the Filters Panel
From the Participants tab, click the filter icon (the little “pizza” icon) to the right of the search bar. A Filters panel will slide open from the right side of the screen.
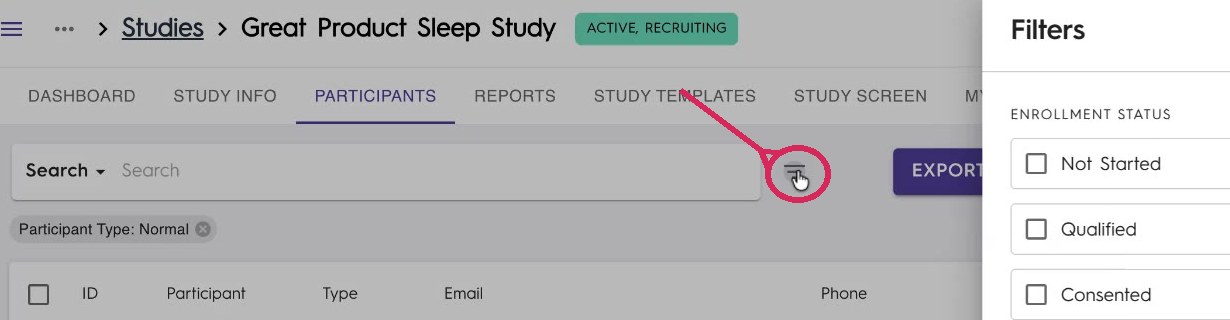
Click the filter icon beside the search bar to open the Filters panel.
The Participant Type Filter (Applied by Default)
When you open the panel, you’ll notice one filter is already turned on: Participant Type: Normal. This is applied automatically so that your view shows your real participants and hides your Tester participants. You’ll see this reflected as a filter chip above the participant list.
If you ever clear your filters, remember to re-apply Participant Type: Normal so that test accounts don’t reappear in your view.

The Filters panel, with Participant Type set to Normal by default.
Filtering by Enrollment Status
The first filter in the panel is Enrollment Status. Check one or more statuses to see only the participants currently in those statuses. Available statuses include:
• Not Started
• Incomplete Qualification
• Qualified / Not Qualified
• Consented — they have consented but are not yet enrolled
• Enrolled
• Screen Failed
• Withdrawn
• Completed
• Closed Out
For example, checking Screen Failed shows every screen-failed participant, and each active filter appears as a chip above the list so you always know what you’re looking at.
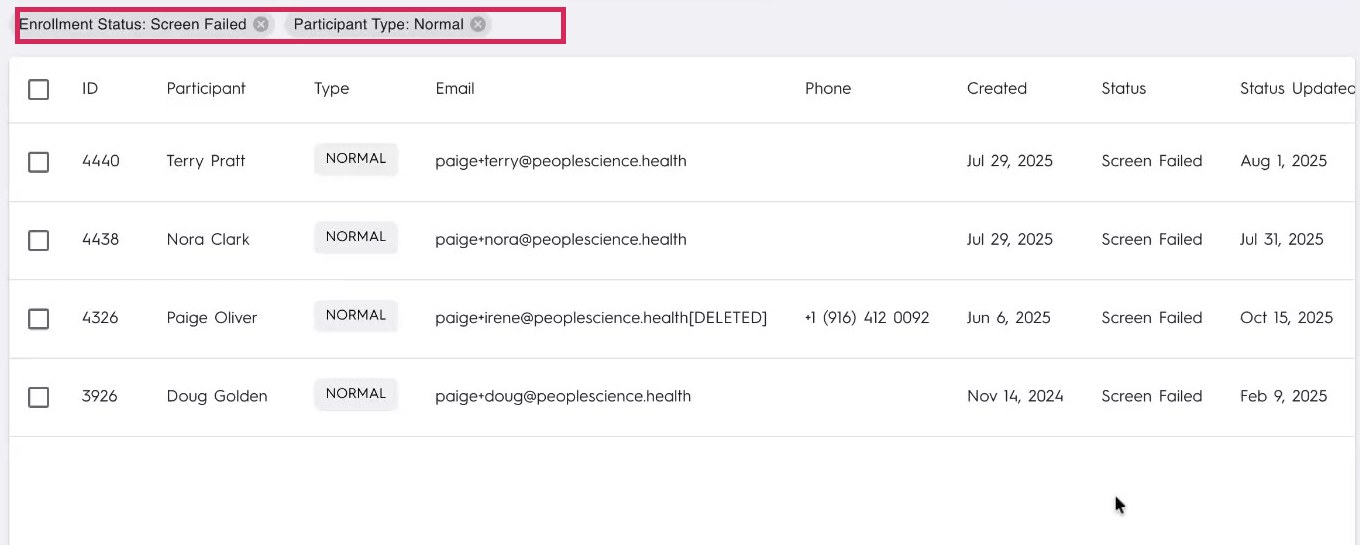
Filtering by the Screen Failed status. Active filters show as chips above the list.
You can also narrow a status by a Date Range. Use the preset ranges (last week, last 90 days, and so on) or choose Custom and enter a start and end date. This shows only the participants who were placed into that status within the range you selected — handy for questions like “who screen-failed in Q4 of 2025?”
Filtering by Compliance
The Compliance filter uses a slider from 0% to 100%. Drag the handles to set a range — for example, 0–70% to find your lower-compliance participants. By default this looks at each participant’s all-time compliance.
To focus on recent behavior instead, add a Date Range beneath the slider (for example, Last 7 days). This looks only at the forms scheduled within that window, inclusive of the start and end dates. It’s a great way to catch someone whose overall compliance still looks fine but who has dipped recently — or to confirm that a previously low participant is back on track.

Compliance set to 0–70% over the last 7 days.
Compliance also appears as a color-coded badge in the participant list, so filtered results are easy to scan at a glance.
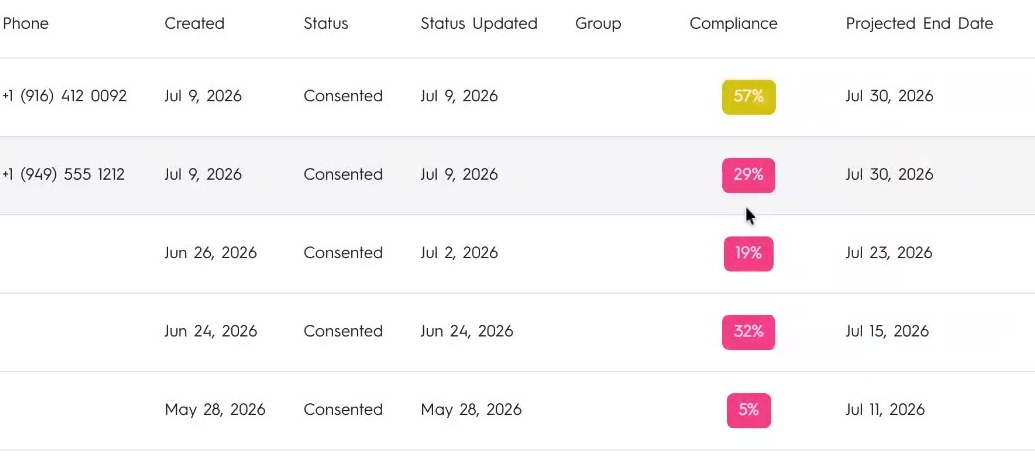
Compliance shows as a color-coded badge in the list.
Combining Multiple Filters
You can apply more than one filter at a time, and Chloe returns only the participants who match all of them. For example, combine Compliance under 70% in the last 7 days with Enrollment Status: Consented to find recently non-compliant participants who have consented but aren’t yet enrolled — a quick, targeted list of people who might need a nudge.
Filtering by Projected End Date
The Projected End Date filter lets you set a date range to see who is scheduled to finish the study within a given window — for example, everyone wrapping up in the next few weeks. This is a fast way to spot participants with upcoming study ends so you can plan any final outreach.
Filtering by Invite Status
The Invite Status filter tracks the invitation flow: Invite Not Sent, Invite Sent, Invite Viewed, and Invite Clicked, each with its own optional date range. This is most useful for closed studies where participants are invited through Chloe. If your study uses a qualification form instead of direct email/text invitations, this filter will be less relevant.
Choosing Table Columns
At the bottom of the panel, Table Columns lets you turn columns on or off and reorder them using the drag handles. This does not carry over between sessions, but it controls both what you see in the current view and — importantly — which columns are included when you export.
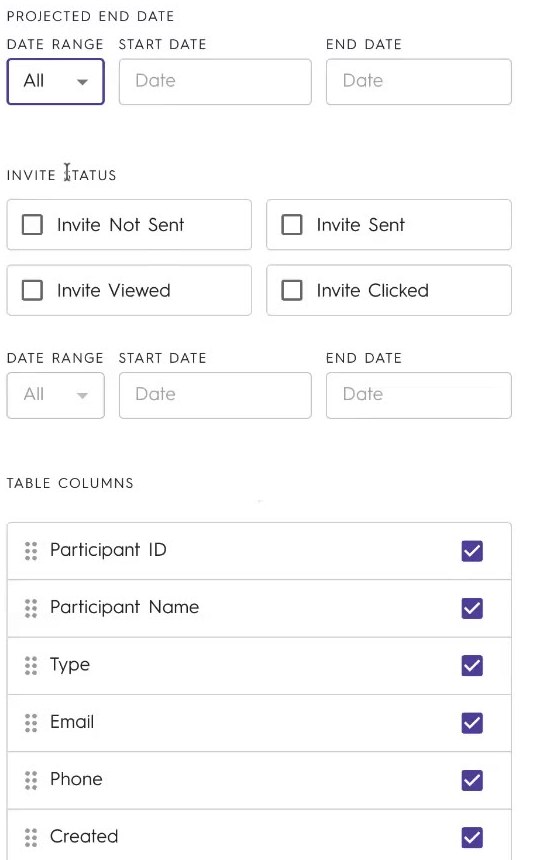
Invite Status filters and the Table Columns list.
Exporting a Filtered List
Click EXPORT (above the list, to the left of Import and Add Participant) to download the current view. The export includes only the participants who match your active filters and only the columns you’ve selected under Table Columns — so setting up your filters and columns first gives you a clean, focused file.

Export downloads only the filtered rows and selected columns.
Clearing Your Filters
To start over, click CLEAR at the top of the Filters panel to remove all filters at once, or click the “x” on any individual filter chip above the list to remove just that one. After clearing everything, re-apply Participant Type: Normal so tester accounts stay out of your view.
Clearing Your Filters
Below is a video walk through of setting up filters on a Participants list
FAQ
Why do I see a “Participant Type: Normal” filter I didn’t add?
It’s applied automatically so your view shows real participants and hides testers. You can remove it, but most of the time you’ll want to leave it on.
Does compliance filter on all-time or recent data?
By default it uses all-time compliance. Add a date range beneath the slider to look only at forms scheduled within that specific window.
Will my column choices be saved for next time?
No — Table Column selections don’t persist across sessions. Set them up each time you need a particular view or export.
Do my filters affect what I export?
Yes. An export reflects your active filters (which rows) and your Table Column selections (which columns). Set both before exporting.