Informed Consent Form (ICF) Build Tutorial
Last updated: October 29, 2025
In this article, you will walk step-by-step through the process of building a simple, single signature Informed Consent Form / ICF in the Chloe Form Builder.
Good To Know - Multiple signature, and countersigned ICF building will be described in a separate article.
For an introduction to what an 📄 Informed Consent is, please read this article.
The articles 📄 Intro to Form Building, 📄 Intro to Form Elements will also provide information and background that will prove useful when building and Informed Consent Form.
Prerequisites: This article assumes that you have already created a study and have Administrator access. If you have not yet created a study, please referenced this tutorial: 📄 Adding a New Study in Chloe
Good To Know: What's the difference between an Intake Form and an Informed Consent Form?
An informed consent form is a type of intake form. Generally speaking, intake form is a way to provide and get information for starting a study. It is the form that sets up a participant in Chloe and gives them a start date in the study, and assigns to them a study template. It guard rails around the participant so they cannot be participating in more than one study simultaneously. An intake form, as defined by Chloe, does not require a signature, whereas an Informed Consent will. For example, a self study does not require an informed consent form, but will require an intake form. An intake form can be data sharing agreement, or an information sheet that doesn't require a signature.
In this tutorial, we will follow these steps:
Create new Intake Form for your study
Informed Consent Text Sections
Confirm Opt-Out Section
Digital Signature Section
Notifications Setting Section
Leave Study / Begin Study Sections
Configure Section Transitions
Publish Your Form
Pro-Tip: This format is considered "Best Practices," but may not be applicable to all studies.
Good To Know: the following form Element are required for an intake form:
Assign Study Template
Notifications Settings
Quit Study (I don't think this is correct but I'll need to validate)
Everything else is optional. For this tutorial we are going to build a fairly robust ICF, complete with opt-out options, an opt-out-confirmation, single signature, and some other features which are common in builds.
1. Add An Intake Form To Your Study.
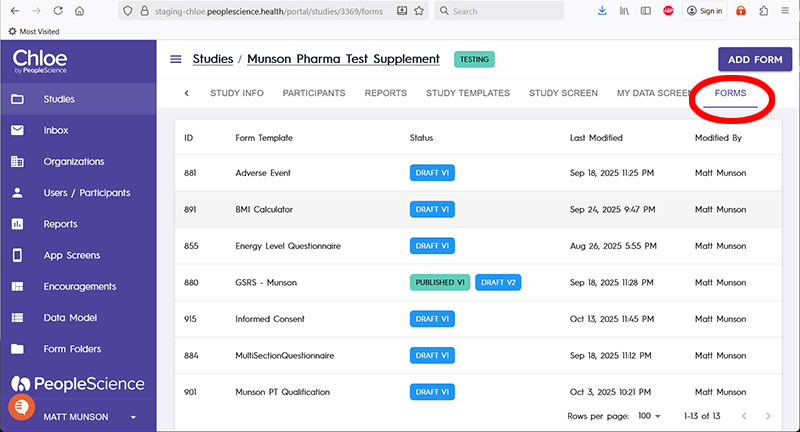
Navigate to the Forms tab in your study.
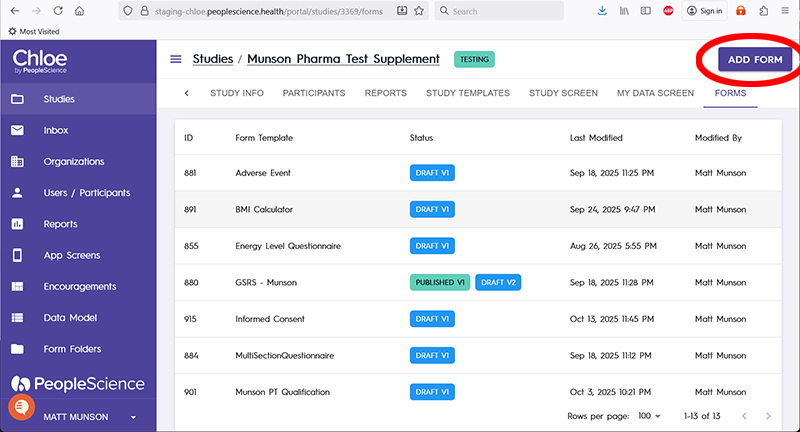
Click on the Add Form button in the upper right hand corner of the page.
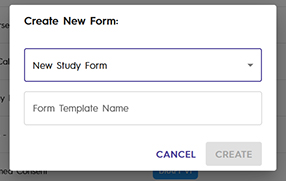
This will open the Create New Form dialog box.
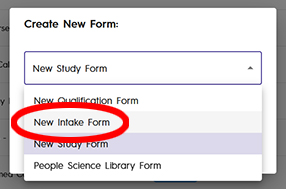
Select New Intake Form from the drop down list.
Give your new form a useful and unique name in the Form Template Name field.
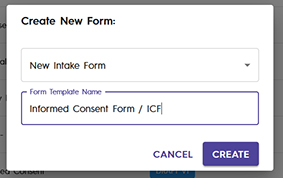
Press the Create button to finish this step.
Once the new Intake Form is created, you will be taken immediate to the Form Info page.
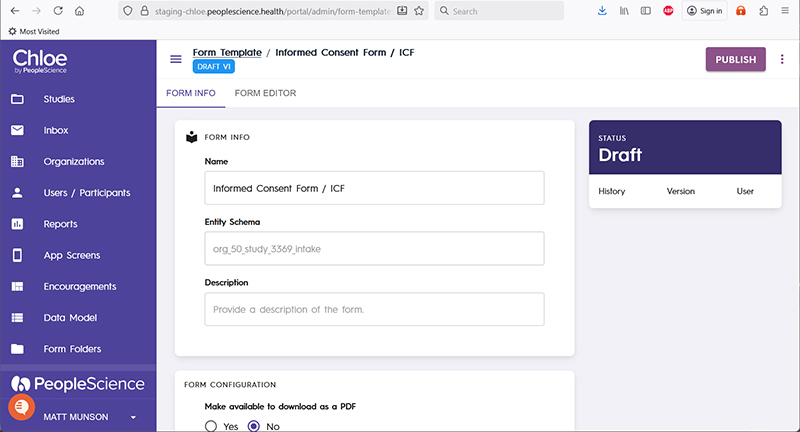
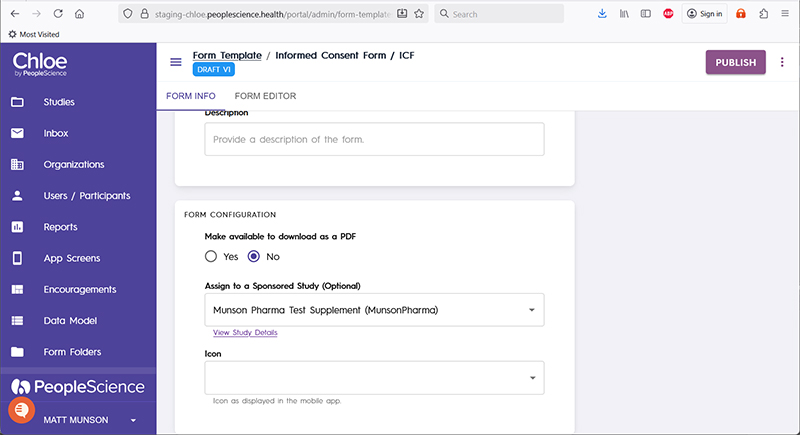
Configure the form to suit the needs of your trial. You are now ready to build the sections and elements of the form.
2. Building the Informed Consent Text Sections
For this tutorial, we will build out a multi-page form. The first four pages, which we will build in this section, contain all of the text that we wish to show to our participant, prior to them making the decision to sign or not. You can include as much or as little information in your form as is needed for your study.
Pro-Tip: You can embed photos, videos, and comprehension questions throughout your ICF.
Click on the Form Editor tab to begin designing your form.
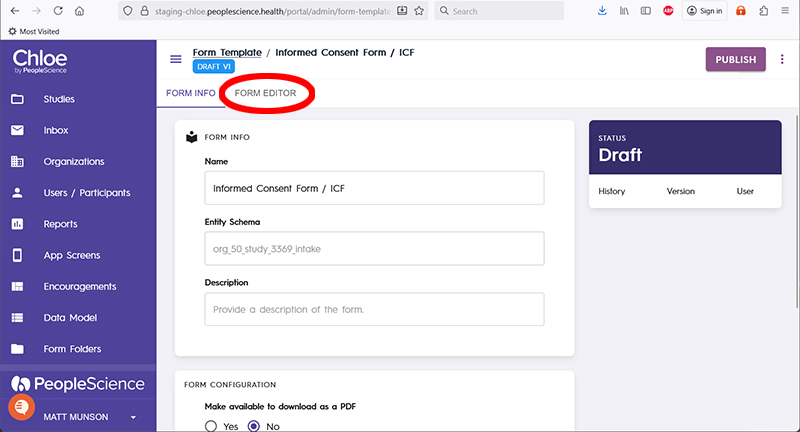
Your new form will look like this in the form editor.
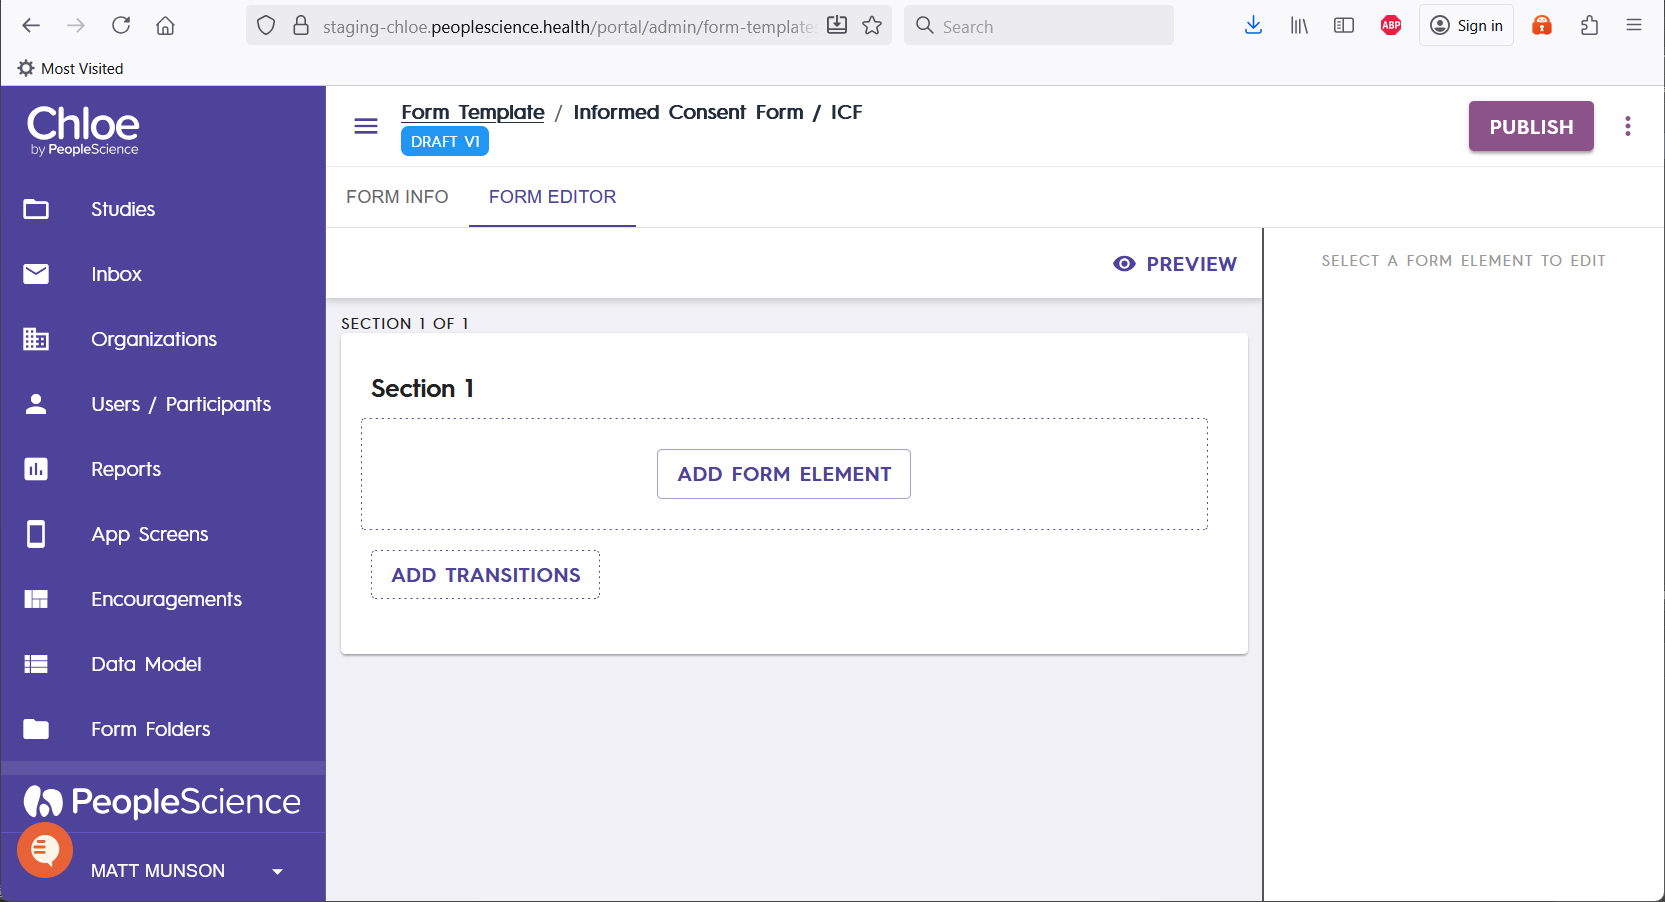
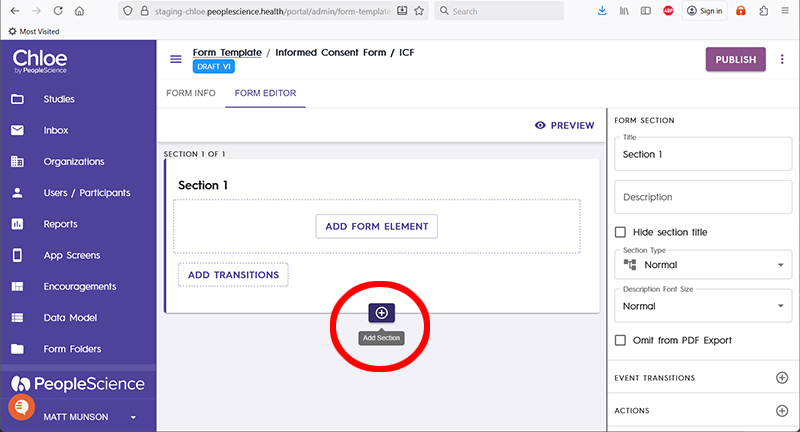
For this example, we will start by creating three new sections. Select Section 1 by clicking on it, which will activate the Add Section pop up. Use that to add three new sections to the form.
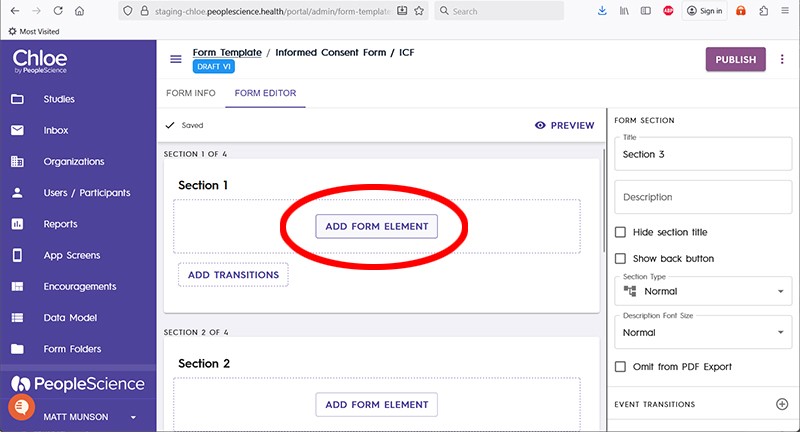
For Section 1 of your form, click Add Form Element.
Click on the newly created form element to select it and activate the Properties Tab on the right hand side of the screen.
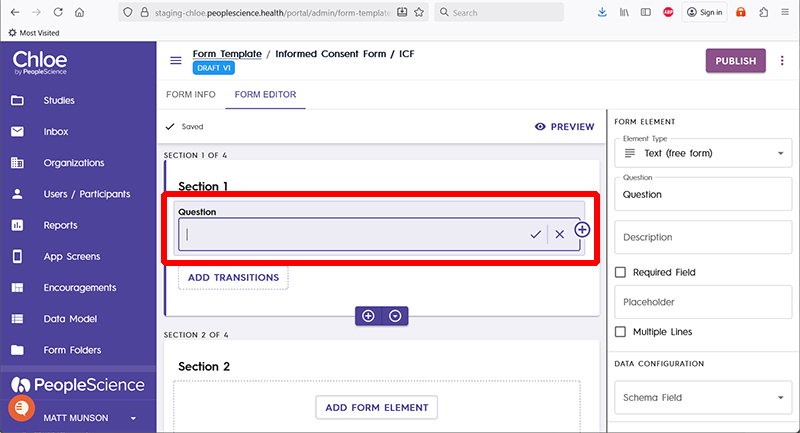
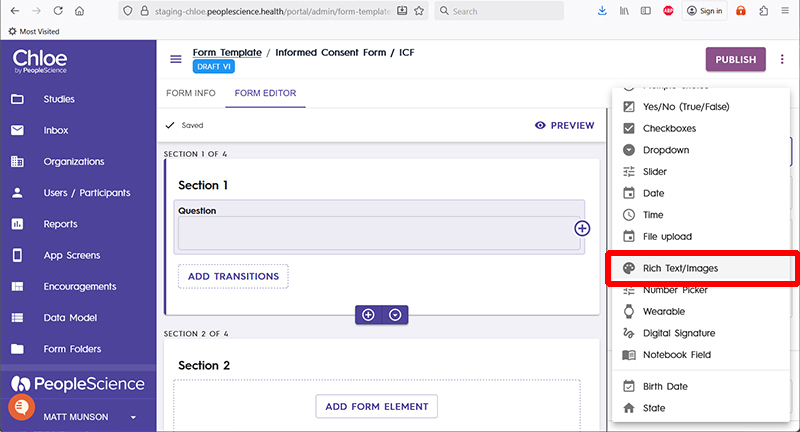
In the Form Element properties tab, select Rich Text from the Element Type drop down menu.
Section 1 should now look something like this, after you have set the Element Type to Rich Text/Images.
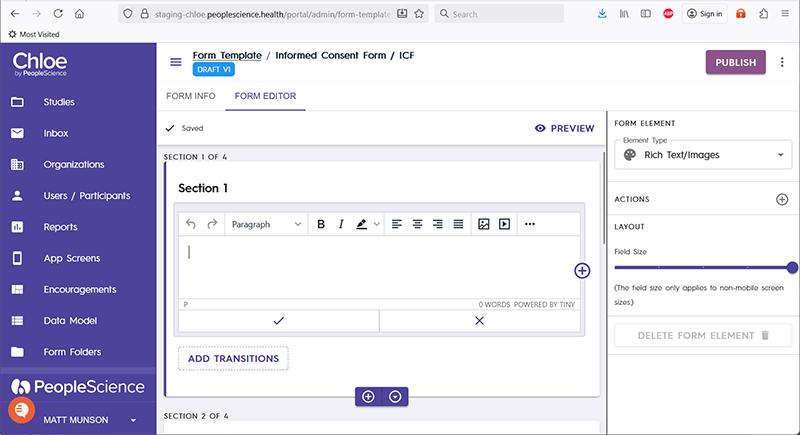
Use this Rich Text editor to create and format page one of your informed consent text.
Pro-Tip: Avoid putting too much text on one section. Ideally, your participant won't have to scroll down to see the full page, but will instead navigate the ICF text using the Next and Back buttons.
After formatting text in the Text Editor and configuring the transition to the next page, the first page of our Informed Consent Form now looks like this:
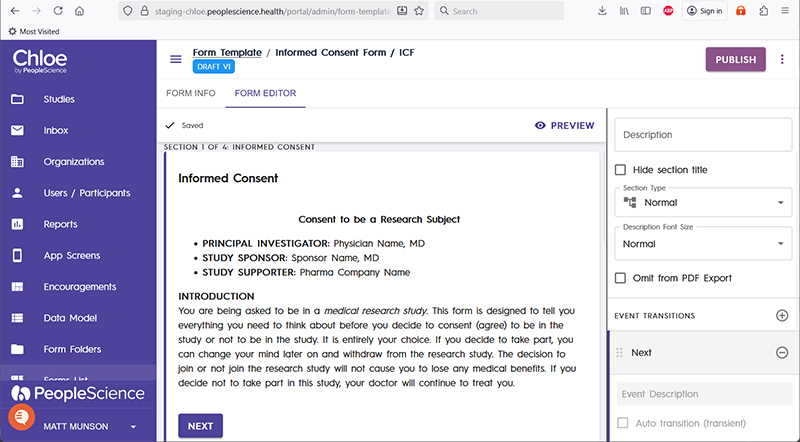
Pro-Tip: the rich text editor is a powerful tool that gives you a lot of flexibility on how to display your text, and what you can include in it. The editor allows you to embed images, videos and URLs within a Form Element. This means you can show your participants graphics, pictures, show videos, and even link to external websites, all within the ICF.
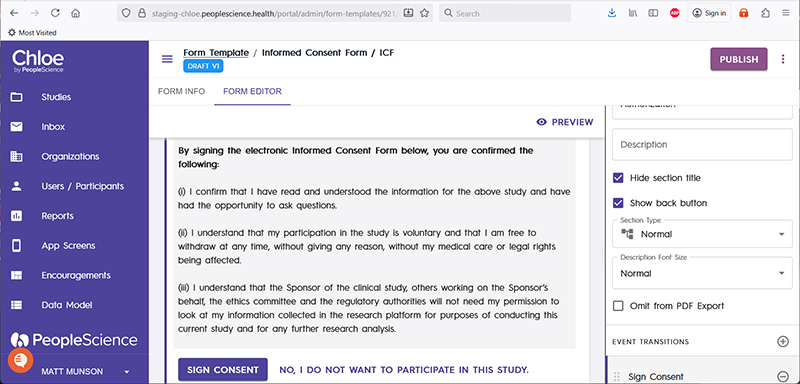
Configure the other sections in your ICF to include the remainder of the text of your ICF. Configure the final page in this section of the intake form to ask a participant if they wish to Sign the consent, or not.
Create a transition that reads Sign Consent. Create another transition that reads No, I do not wish to participate in this study, and check the Text link check box. Once completed, the final Section of your ICF text should look something like this:
With your first few pages built, go back to page one and be sure that all of the Next buttons are configured to transition to the proper page. The Back button will be handled automatically by Chloe, assuming you have the Show Back Button option selected. Us the Preview function to ensure that your form is behaving as designed.
Pro-Tip: If you wish to create and configure your own Back buttons, you can do this by adding a transition to a section, naming it, then configuring a to option from the drop down list.
In the next few steps of this process, we will build out sections that are accessed during different phases of the workflow. In the final step of this build, we will configure all of the transitions that we leave undone.
3. Opt-Out confirmation
You may or may not want to give your participant some flexibility in their opt out workflow. Think of this as an "are you sure you're sure??" page.
Create a new section in your form.
Pro-Tip: It will make sense visually for this section to exist after all of the ICF text sections that you're presenting to your participant to read. Keep the workflow as linear as possible within the Form Builder.
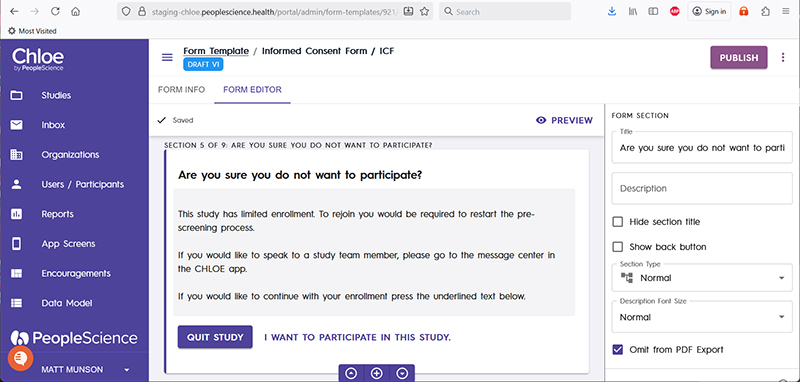
Configure the Section Title to read "Are you sure you do not want to participate?" or something similar.
Add an Element and set its type to Rich Text Editor, then create your message to the participant informing them of the consequences of quitting. Offer them the option to Quit Study, or move forward with participation.
Add an Event Transition and set it's name to Quit Study in the section configuration tab.
Create another Event Transition with the name I want to participate in this study, check the Text Link box.
We will configure the destinations for the transition button and link at the end of this tutorial, once we have built all the needed sections.
Check the Omit from PDF Export box, as you do not want this text included in any export after a signature has been acquired.
Good to know: All of the sample text used in this tutorial is merely for illustrative purposes, or suggestions. Use whatever text you believe will best convey information to your participants.
Once this section is fully configured, it should look something like this:
4. Building the Signature Page
Next we are going to build a signature page that asks the participant to type in their full name, write their signature with their finger, then submit the consent form. We will also give the participant another opportunity to opt-out of the process, though this is optional.
Create a new section. Click the Add Form Element button to add a new element, then select the newly added element to bring up the pop up menu, allowing you to add a second.
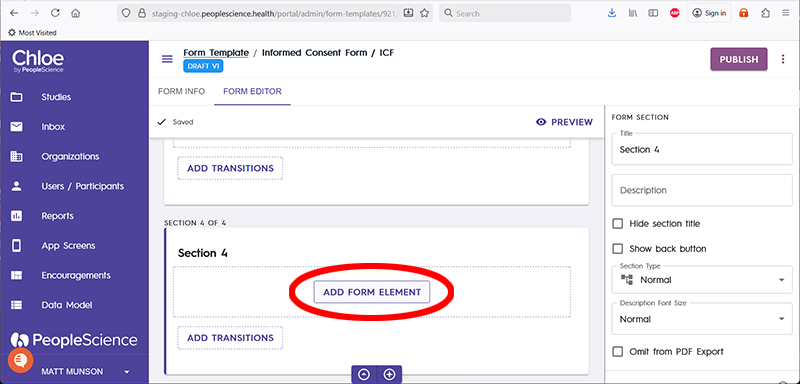
Your section will now look like this:
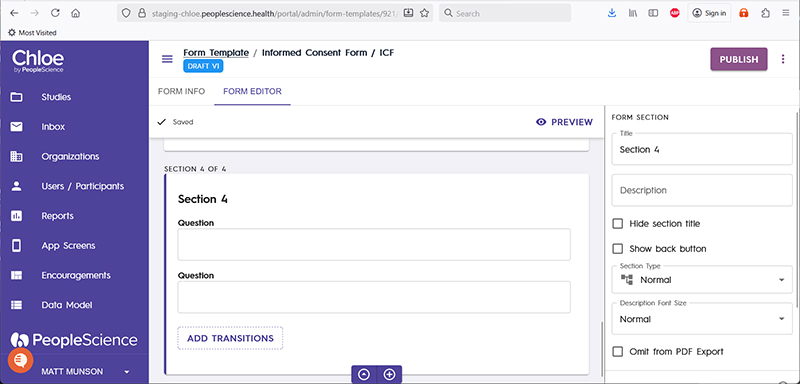
Select the second element in the form, then choose Digital Signature from the Element Type drop down list on the configuration tab.
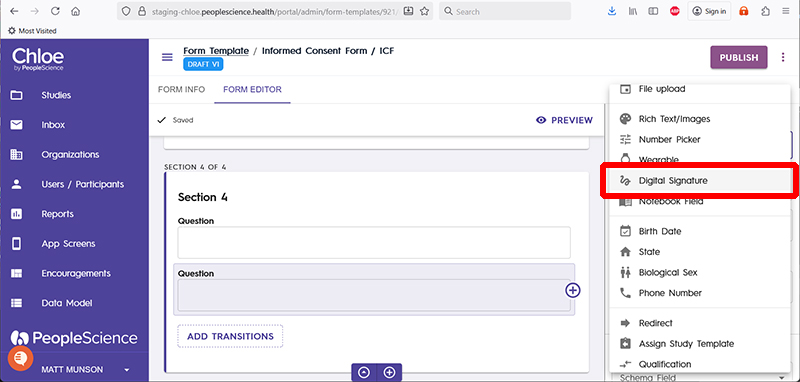
Your Section should now look like this:

Update the Title of the section.
Select each of the Elements and type some meaningful text in the Question field on the configuration tab.
Check the Required Field check box for both the text and signature form elements.
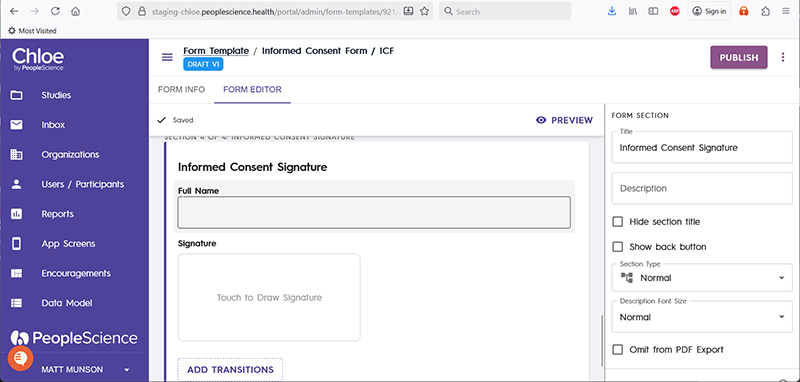
Click on the Add Transitions button at the bottom of the section. Rename it Sign Consent. We have not yet built the section this button will transition to, so leave that drop down in its default state for now.

Create a new Event Transition by clicking on the + sign next to the Event Transition item on the Configuration Tab for this section.
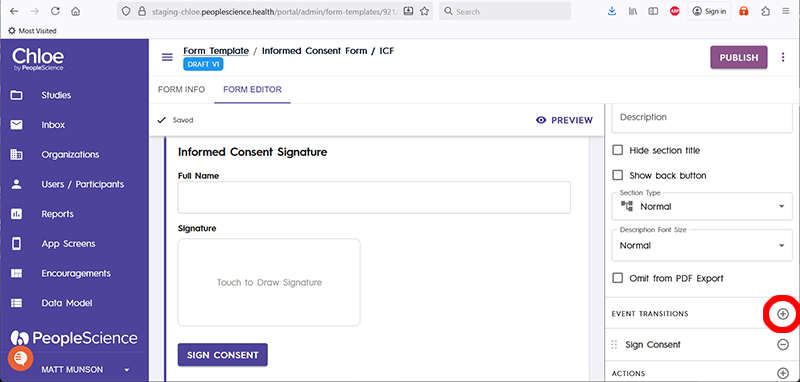
Configure the forms opt-out link as follows. Make sure the Text Link box is checked. Use some text like No, I do not want to participate in this study to show your participants the link to click if they wish to opt out.
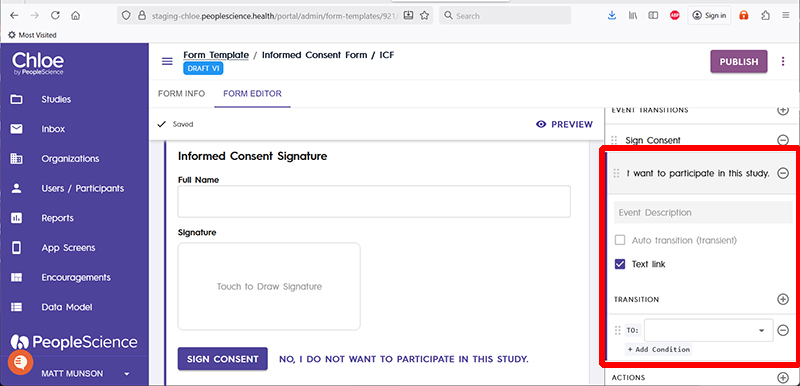
Leave the To drop down blank, as we have not yet created the destination for this transition.
Our signature section is now complete. Let us turn our attention to building out the destinations for the Sign Consent option.
5. Building the Notifications Settings Page
A mandatory component of an intake for is the Notification Settings Page. This is where the participant specifies when they would like to receive notifications from the app. Depending on the needs of your study, and when important events take place for your participants, you can fine tune the time window in which a participant can request notifications. For example, if your intervention requires a morning activity, you can time box notification opportunities to the morning hours. Conversely, you can constrain notifications to the evening.
Add a new section to your form.
Change the title to Notifications Settings.
Add a form element and configure the element type to Time.
Add in text to give instructions to your participants.
Configure the text on your transition to read Start Study. Your section should look something like this:
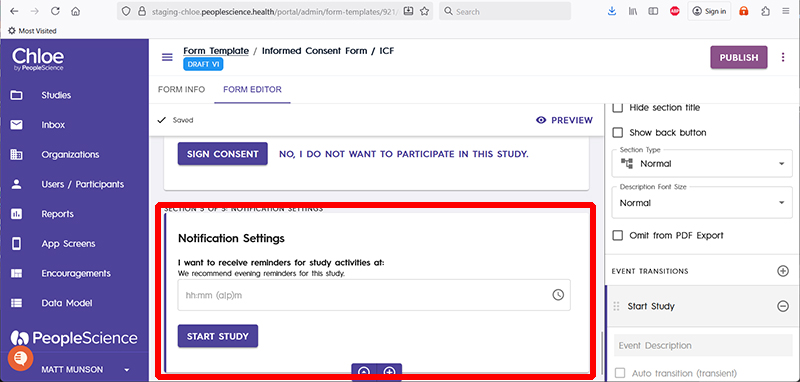
Next, let us configure the window in which a participant can select notifications. This is optional, and should be configured to represent the needs of your study.
Select the Time element in your Notifications Setting section to activate the configuration tab for this element.
Check the Required Field box, ensuring that the participant must select a time.
Configure the Min Time and Max Time fields to define the window in which a participant can select from. In this example, we will chose 4:00 PM to 8:15 PM.
Set Time Increment (minute) to 15.
From the Data Configuration drop down, select Notification Time. If that field is not listed in the drop down, create one.
This is what your section and settings should look like at the end of this step.
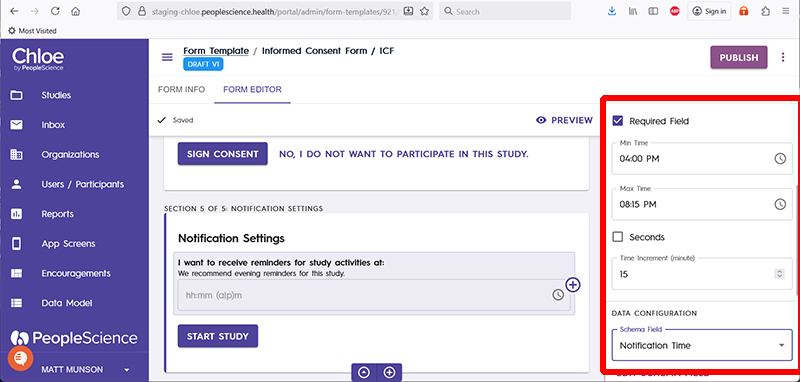
We will configure the Start Study button later in the tutorial.
6. Build Quit and Complete Sections
In this step, we will build out the final two components of our informed consent. These are the termination points for the various flows of the ICF. One will be for a participant who does not wish to participate in the study, and the other is for those who do.
To build the Quit section, start by creating a new Section.
Give it a title like Quit Study, so your participant knows where they are in the process.
Set its Section Type to Final (Form Complete) from the Section Type drop down.
Add a Form Element to the Section, then set its type to Quit Study in the Element Type drop down menu.
Check the Omit from PDF Export box, to ensure that this page will not be included in the export.
The Section configuration options should look something like this after completing these steps:
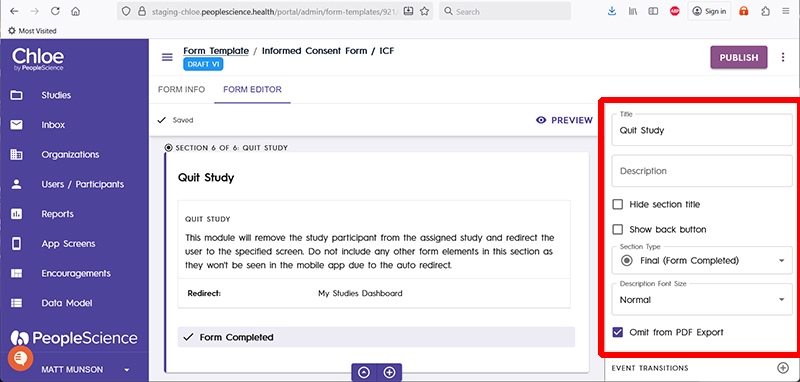
The Element configuration options should look like this:
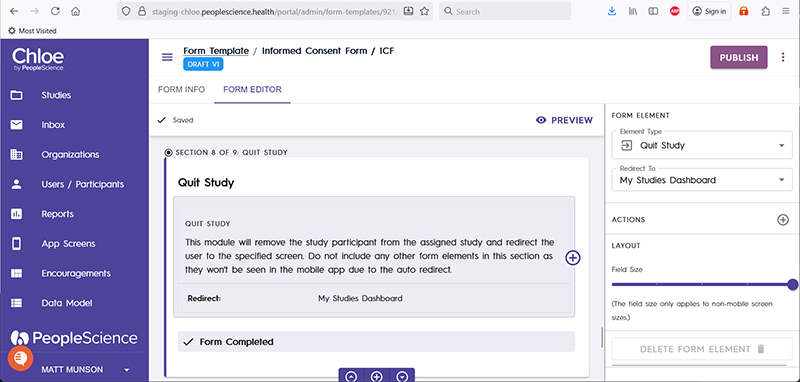
Next we will build and configure the Complete section.
Create a new section. Set its Title to Complete Consent.
Set its Section Type to Final (Form Complete) from the Section Type drop down.
Check the Omit from PDF Export box, to ensure that this page will not be included in the export.
Add a Form Element to the Section, then set its type to Assign Study Template in the Element Type drop down menu.
From the Select Study Template drop down menu, choose a Study Template from the list of templates built out for your study. This will be the study template that is assigned to the participant who signs this informed consent, or completes this intake form.
From the Redirect To drop down menu, choose where you want your participant to go next. In this example, we are going to point them to the Study Details page.
Your Complete Consent Form Element configuration page will look like this after it is configured:
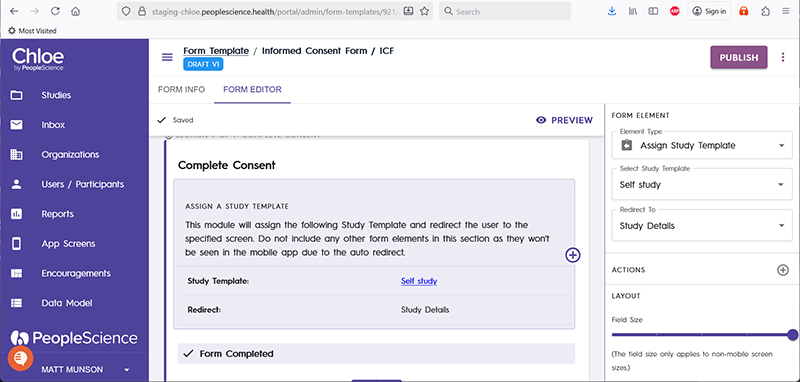
Congratulations, you have now built all of the sections needed for this ICF.
7. Connect The Sections Together Into The Final Workflow
Now that we have built out all of the sections needed for our Intake Form, we need to configure all of the transitions (think of these as the Back and Next buttons on each section) on each section and ensure that they guide our participant through the workflow as designed.
In case you did not configure the transitions for the text Sections at the beginning of our form, we will start there. This is the easiest part as you will simply be moving from one page to the next, or backwards, depending on what options you enable for your participant.
On the first section, select the Next button and navigate to the Transitions section on the properties tab. From the To drop down list, select the section that you want the patient to be routed to when the press the Next button.
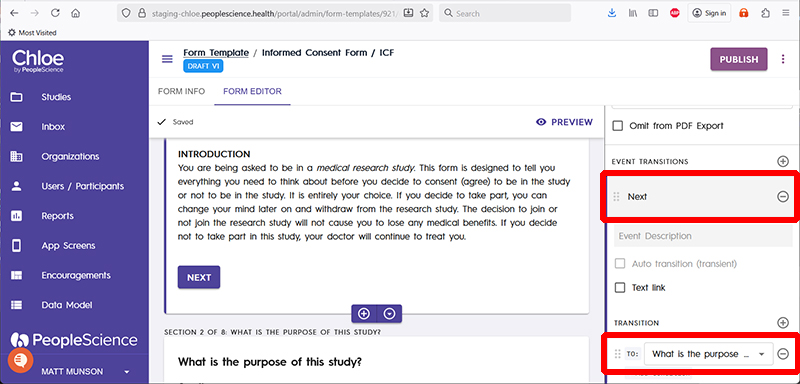
In this example, we are configuring the Next button to transition to the "What is the purpose of this study?" page, which can be seen at the bottom of this screen shot.
Repeat this process for all of the text pages in your ICF that have a linear order. Page one leads to page two, page two leads to page three, etc.
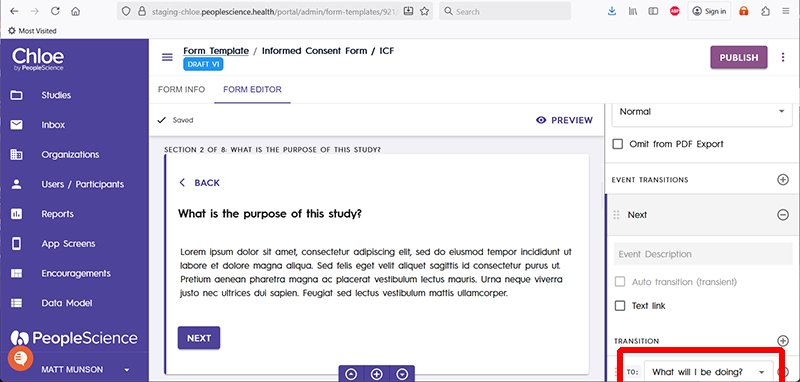
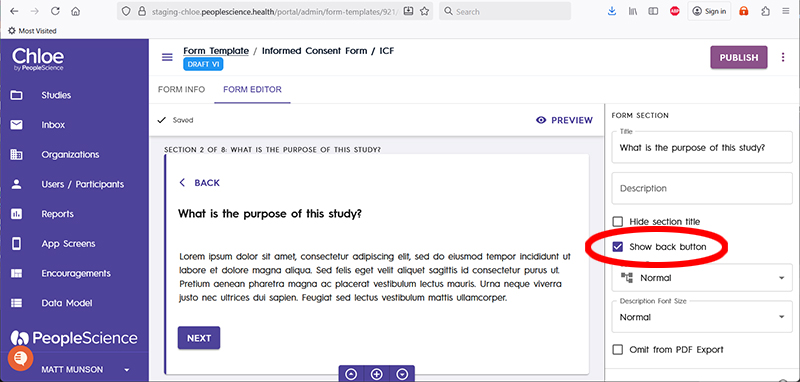
Pro-Tip: Starting on Section 2 of your form, you have the option of including a Back link. Check the Show Back Button check box in the configuration tab for the Section you wish to include a Back link on.
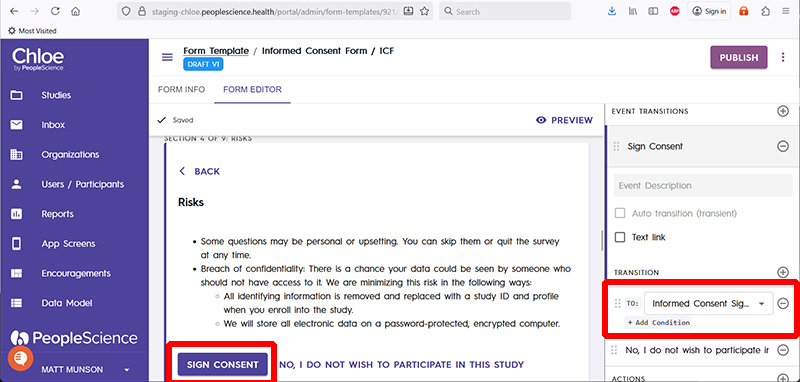
The final page of your ICF text is where we ask our participant if they want to sign or opt-out. Configure the Sign Consent Transition to point to the Informed Consent Signature section.
Configure the No, I do not want to participate in this study Transition to point to the Are you Sure section.
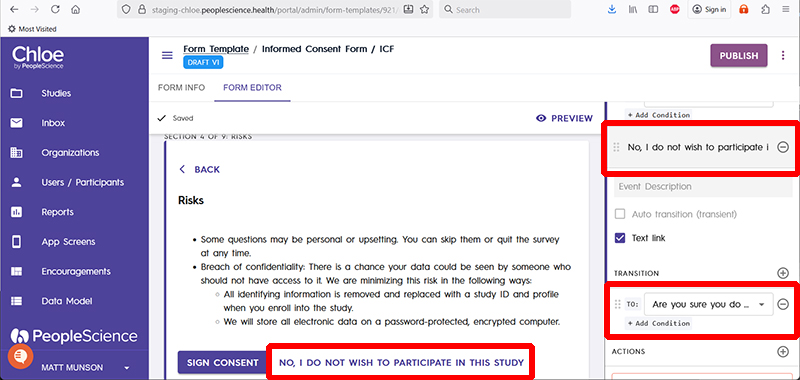
That completes the transition configuration for that Section. Let us move onto the next section, the opt-out confirmation.
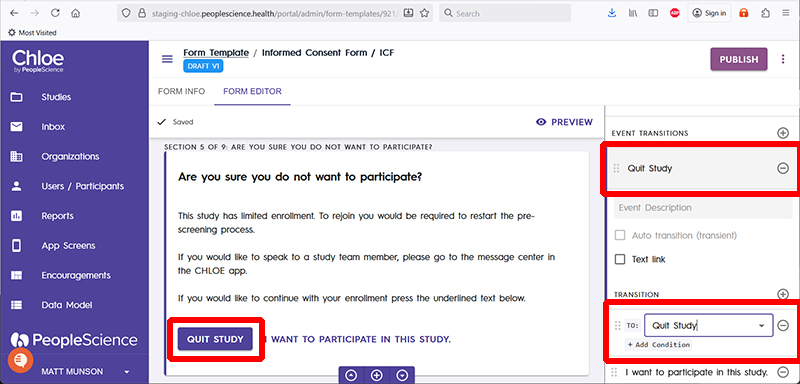
Configure the Quit Study transition to direct to the section named Quit Study.
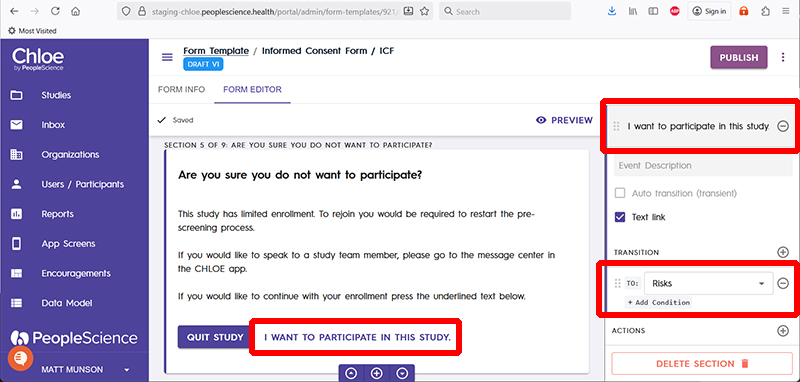
Configure the I want to Participate in this Study transition to point to Risks, or whatever the last page is in your ICF text. In our example, this will loop the participant backwards in the workflow to the page in the ICF where they are asked if they want to sign or opt out.
Next let us configure the transitions on the Informed Consent Signature section.
Configure the Sign Consent transition to take the participant to the Notification Setting section.
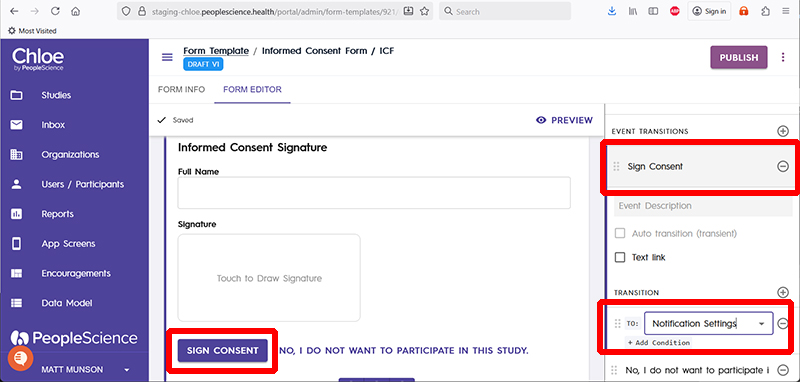
Configure the No, I don't want to participate in this study transition to direct to Are you Sure you do not want to participate?

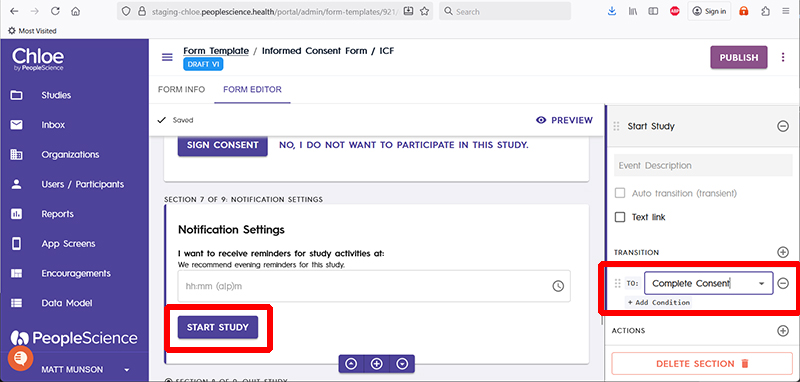
Move onto the Notifications Settings Section. Configure the Start Study transition to direct to Complete Consent
Your intake form is now fully built and configured.
Be sure to test it using the Preview function to ensure that the form is behaving the way you want it to.
8. Publish Your Form
Lastly, press the Publish button to finalize this version of your form, and to make it available for use in active studies.
