Form Sections - Tutorial
Last updated: July 22, 2026
This article explains how to create and configure Form Sections in the Chloe Admin Portal.
Using Form Sections typically involves four fundamental steps:
Create & Configure the section
Add and configure form Elements
Create and configure section transitions
Create and Configure the Section
When you create a new Form, a Section is created by default. If you wish to create additional Sections, use the "+" button at the base of an existing Section. Once a section is created, access its configuration panel by selecting it with your mouse.
Pro-Tip: Give your section a unique and meaningful title. This will be useful when configuring your section transitions.
For a full list of Section configuration options, please refer to this article:
📄 Form Sections - Configuration
Add and configure form Elements
Form Elements contain the questions you're going to ask your participant, or the information you're going to show to them. Press the Add Form Element button in the center of the section to add an element.
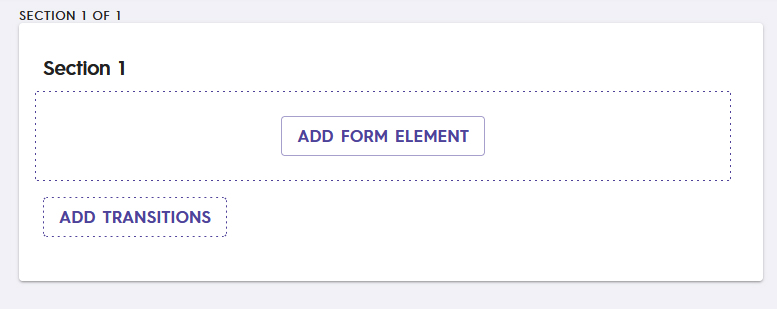
Chloe by default adds an element of type Text (free form) to the section, which can then be configured to be any type of element using the configuration panel.
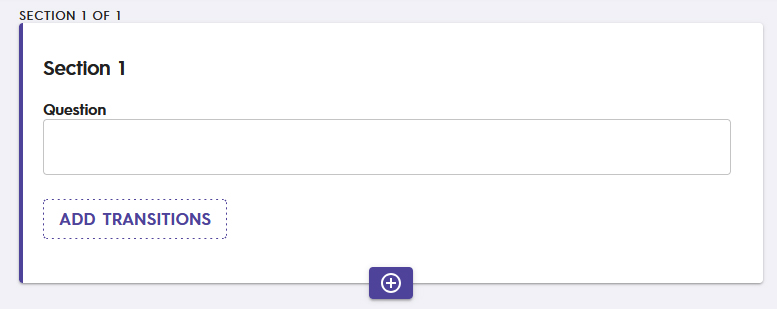
Use your mouse to select the Form Element you wish to configure. Selecting an Element activates the configuration panel for it.
For a thorough tutorial on Form Elements and their configuration, please refer to this knowledge base article: 📄 Intro to Form Elements
Create and configure section transitions
Transitions are buttons or links that guide the flow of control of the section. It tells Chloe where to go next after the current section is complete.
To create a transition, select a section then click the "+" in the Event Transition row in the configuration panel.

Configure the transition to meet you forms design specification
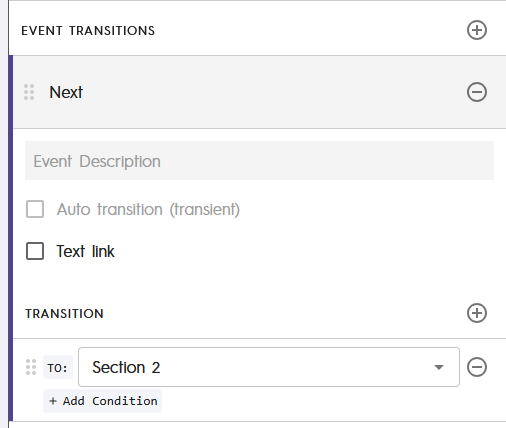
The most important fields on this screen are the Transition Name (set to Next in this example) and the To: drop down, which is set to Section 2. The To: dropdown tells Chloe where to transition flow of control once this button is pressed. For this form, when the participant presses the button named Next, it's going to take them to the section named Section 2.
For a complete list of configuration options for Event Transitions, please refer to this article: 📄 Form Sections - Configuration
For a detailed tutorial on branching logic for transitions, please refer to this article:
📄 Branching Logic & Conditional Transitions
For a complete list of all configuration fields and their options, please refer to this article: