Building a Qualification Form
Last updated: October 13, 2025
This article will walk the reader through the process of building a Qualification Form in Chloe, step by step.
Qualification forms are used to screen participants before they enroll in a study, in order to determine if they meet the criteria that the study protocol has defined.
A Qualification Form is a unique type of participant facing form which requires some steps that diverge from a more traditional survey or questionnaire build. For that reason, the fundamentals of form building are not covered here, but can instead be found in this article in the knowledge base. 📄 Intro to Form Building
1. Create Your Qualification Form
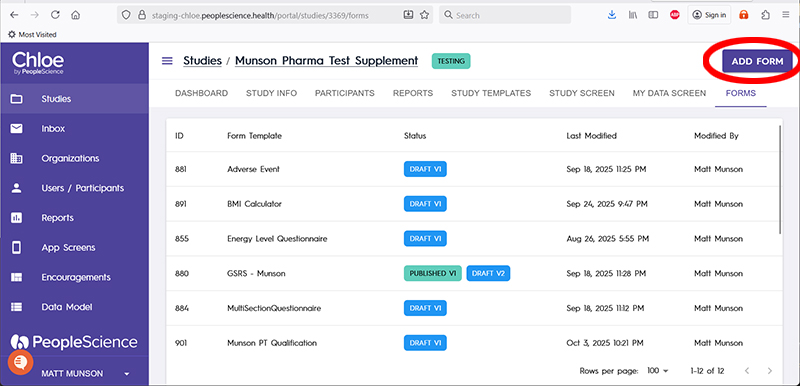
Once a study has been created, navigate to the "Forms" tab, where you may add a Qualification Form. Click the "Add Form" button in the upper right hand corner of the page to begin.
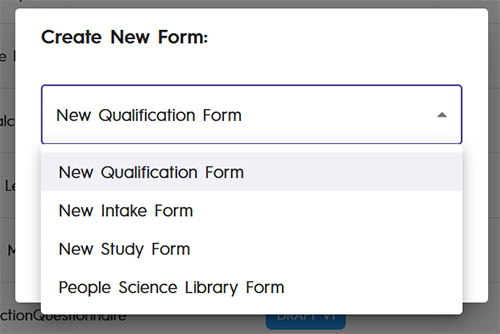
Select "New Qualification Form" from the drop down list on the "Create New Form" dialog box.
Enter the name of your new form in the "Form Template Name" field.
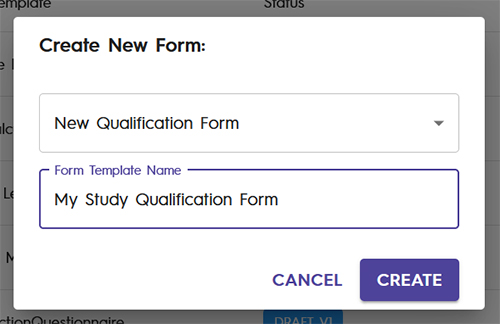
Press the "Create" button to begin the building process
2. Configure The Qualification Form
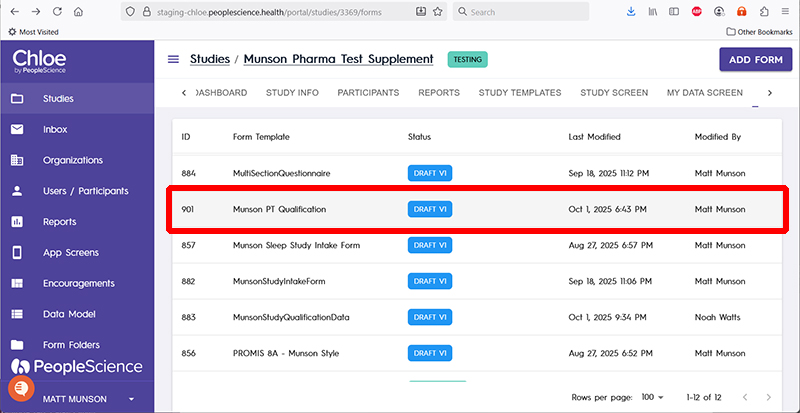
Click on the newly created line item on the Forms tab to access the Qualification form.
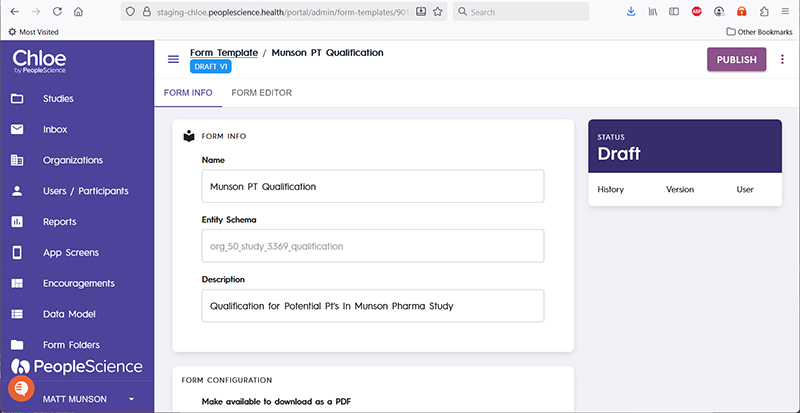
This will take you to the Form Info page. Enter information about your form in the fields provided. This will be used in the display and use of your form.
The Description field is optional, but can be helpful for explaining the particulars of this form.
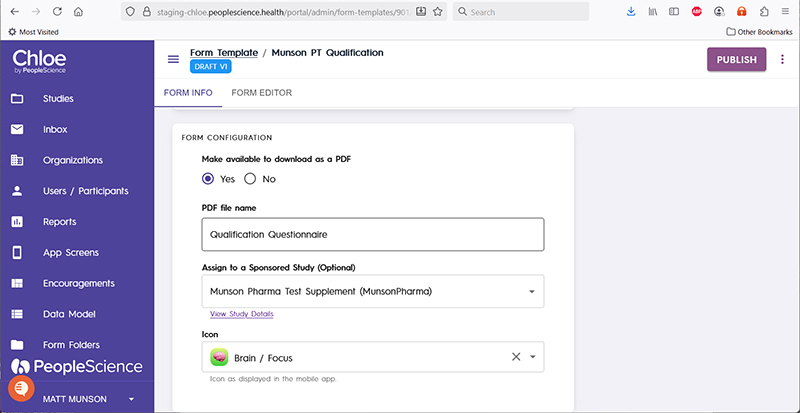
Allowing a participant to download and save the form as a PDF is especially useful for informed consents.
Select an icon from the drop down list which best illustrates the nature of the form. This icon will be displayed to the participant in the mobile app.
2. Build Screening Questions For The Qualification Form and Assign Schema Field Names
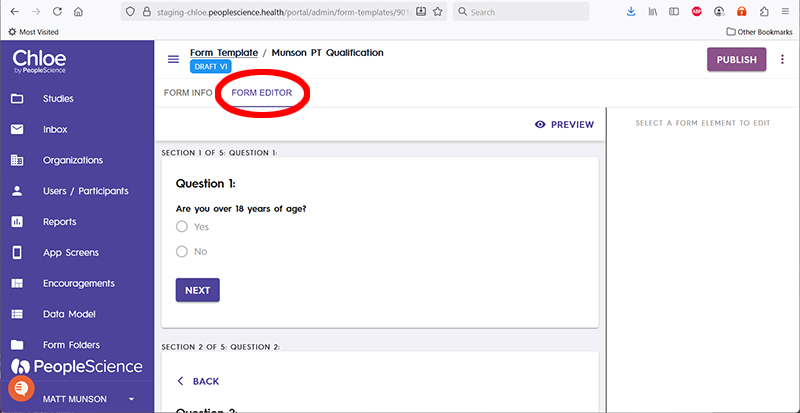
Click on the "Form Editor" tab to create sections for your screening questions.
A thorough tutorial on Form Building can be found here: 📄 Intro to Form Building
For each Form Element in your screening question Sections, be sure to assign unique and usefully-named Schema Field Names to each question. These will be used when defining qualification logic.
Select a Form Element to activate the Configuration Tab on the right hand side of the screen.
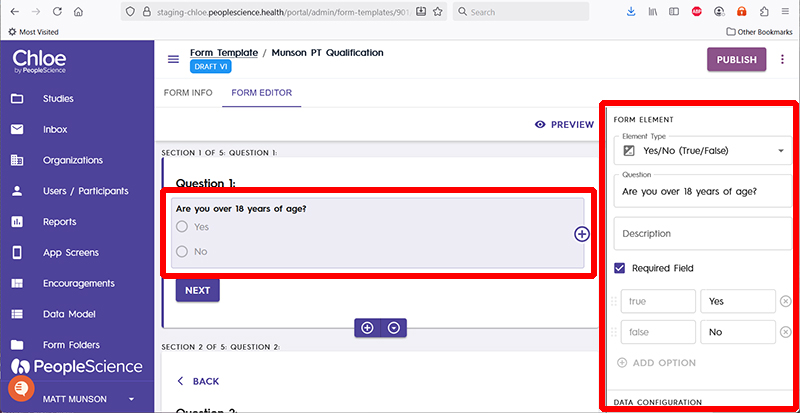
Scroll down in the configuration Tab until you reach the section named "Data Configuration." Using the drop-down menu named "Schema Field," you can choose from an existing list of element names, or create a new one.
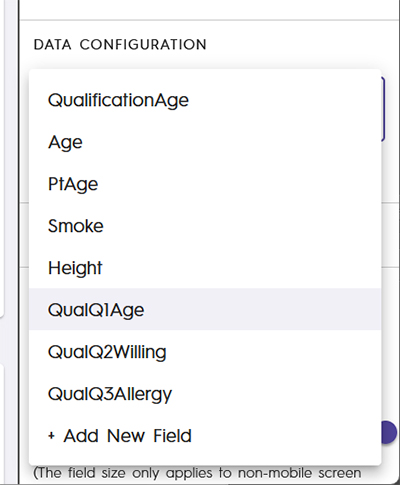
Pro-Tip: Create field names that are easy to understand and also represent the nature of the data you are capturing. Names like "Data1" or "PTInput12" can lead to confusion later, whereas names such as "ParticipantAge" or "PTWillingToTravel" are much more useful.
Once all of the questions required for your Qualification form have been created, and usefully named Schema Fields have been assigned, you are ready to move onto the next section.
3. Add Qualification Form Elements
A unique aspect of Qualification Forms is the inclusion of two specialized Qualification Form Elements. These are the destination sections for a participant which will inform them whether or not the qualified for the study. You will create one Section for a participant that qualifies for the study, and another for a participant that is not qualified.
Add in two new sections to your form, after all of your qualification questions.

Name the Form Sections "Qualified" and "Not Qualified" respectively, or use names that are meaningful to you and your study.
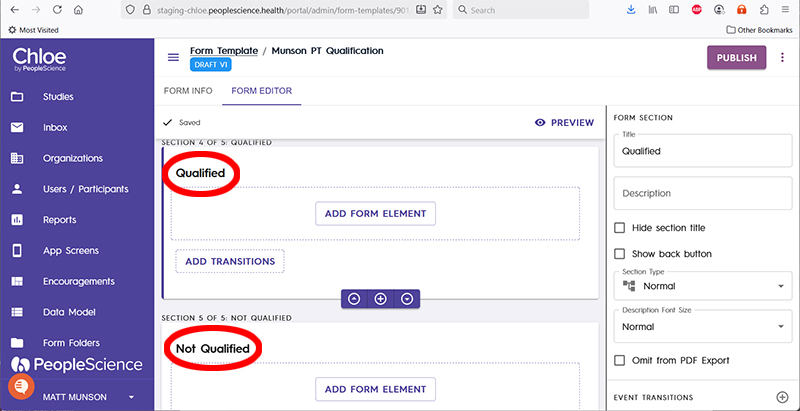
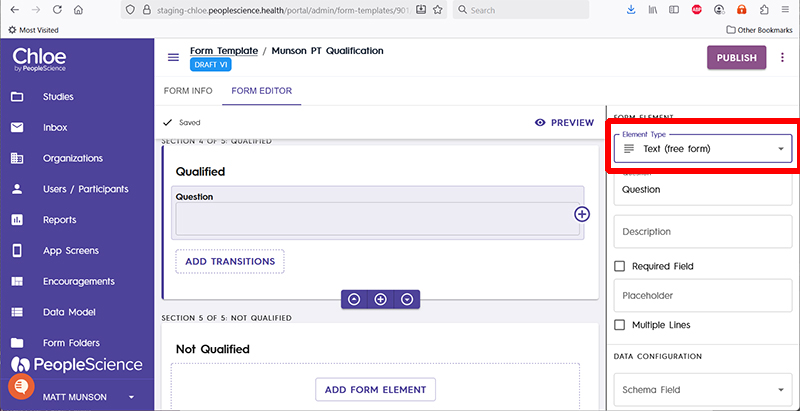
For both of these section, click on the "Add Form Element" button. Once the new element is created, select it to activate the Configuration Tab. Select the "Element Type" drop down list...
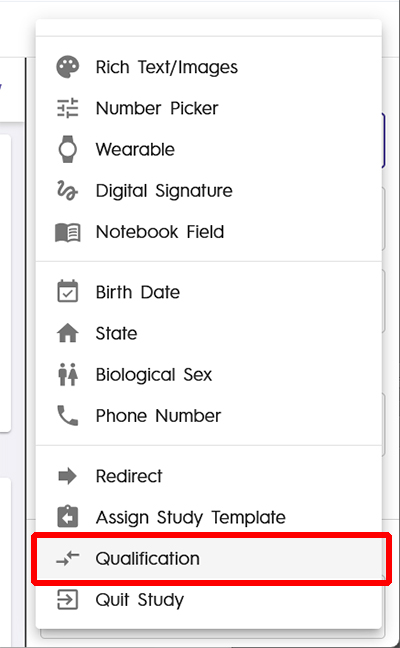
And select "Qualification," which is located near the bottom of the list.
Complete this step for both of the newly created form Sections.
This is what the sections should look like after you have added the Qualification form element to the sections:

Set the Qualification Status for each of the two sections.
Select the form element then select the "Qualified" drop down on the Configuration Tab.
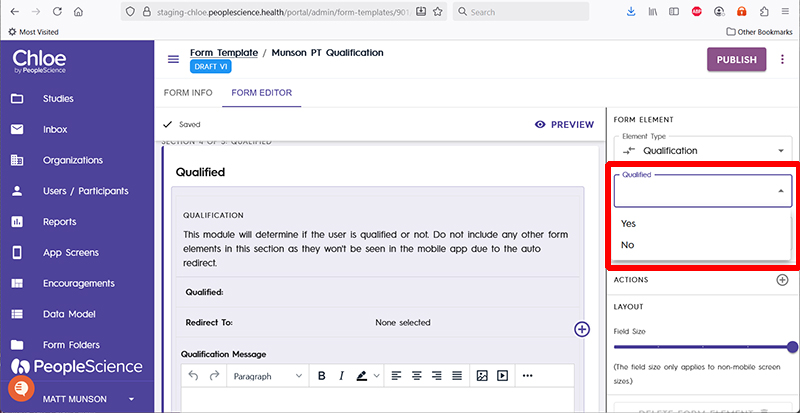
Qualified section: assign “Qualified: Yes”
Not Qualified section: assign “Qualified: No”
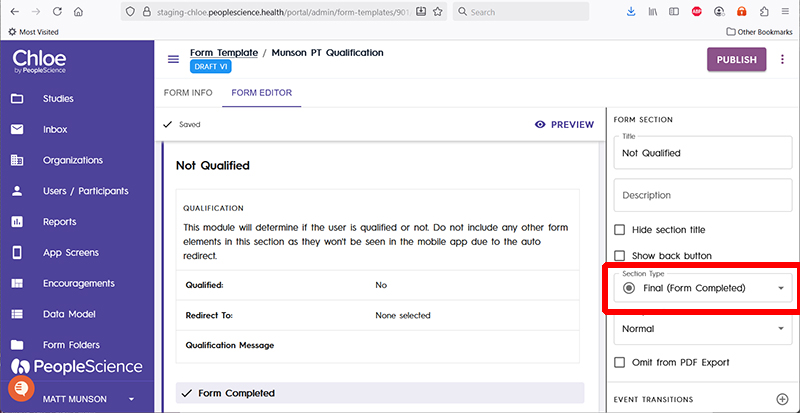
Mark both sections as Final (Form Completed) in the section settings. Do this by selection a form section, then navigate to the "Section Type" drop down menu. Select "Final (Form Completed)" from the drop down list.
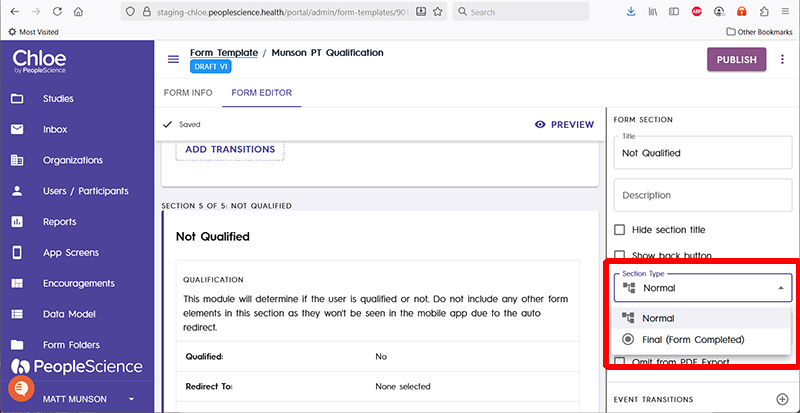
Once complete, your sections configuration tab will look like this:
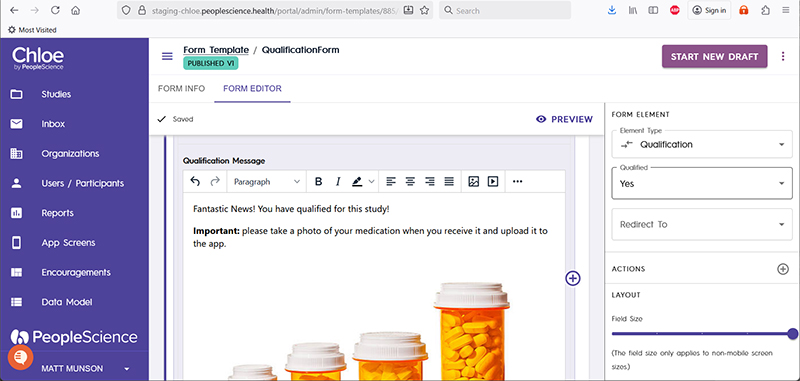
Pro-Tip: If you click on the Qualification form element on one of these newly created Sections, it will open a Rich Text Editor within the element. Use this to customize a message to your participants, giving them more information on their qualification for the study and provide next steps. You can also use this space to show graphics or images to help them on their study journey.
4. Set Up Qualification Logic
Qualification Logic is how Chloe determines if your patient is qualified for the study or not, based on their answers to the questions they are asked.
Good to Know: As an example, if your study requires that a participant be over the age of 18 and is willing to take the required supplement, Qualification Logic will check to ensure that both of these questions were answered yes. If one or both of the questions were answered No, the participant would not qualify. Qualification Logic checks the answers that a potential participant has given and compares them against the responses necessary for qualification.
There are two different options for setting up Qualification Logic. You can calculate it at the end of each step, or you can wait until all questions have been answered to calculate. It is up to you to determine which one is best, and makes the most sense for your process.
Pro-Tip: This is where your Schema Field Names you created or specified in step 2 will come into play.
Option 1: Execute qualification logic after each section has been completed by the participant. Use Transitions to move to the next section if qualification conditions are met OR to move to the Disqualified message or section if conditions are not met
Select the section of your form that you wish to create or edit qualification logic for. This will activate the Configuration Tab on the left hand side of the screen and populate it with information for the selected section.
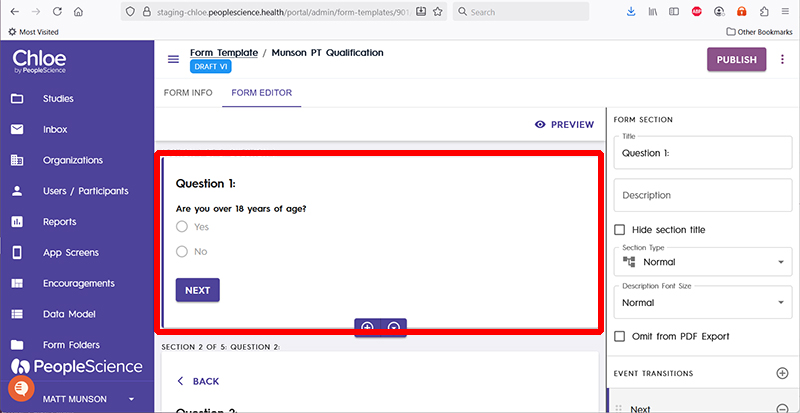
Scroll down on the Configuration Tab to the Event Transitions section.
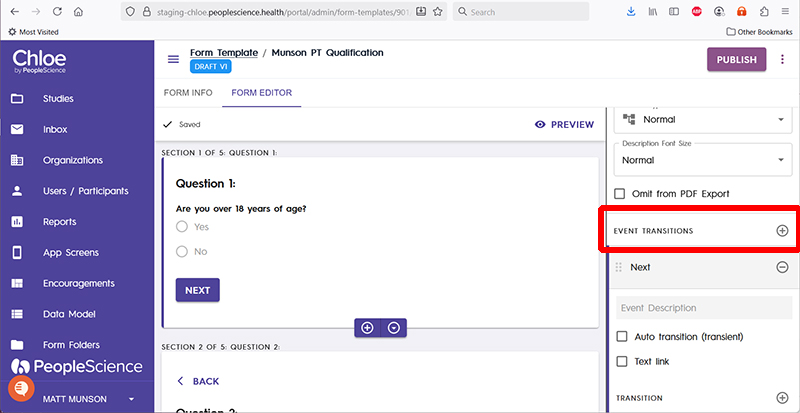
Create a transition to move the participant to the next question upon entry of a correct/qualifying answer. For this example, we are going to define logic for the "next" button on section one. The section of interest in the Configuration Tab looks like this:
Pro-tip: if you have not yet created a "next" button on your section, please refer to the 📄 Intro to Form Building
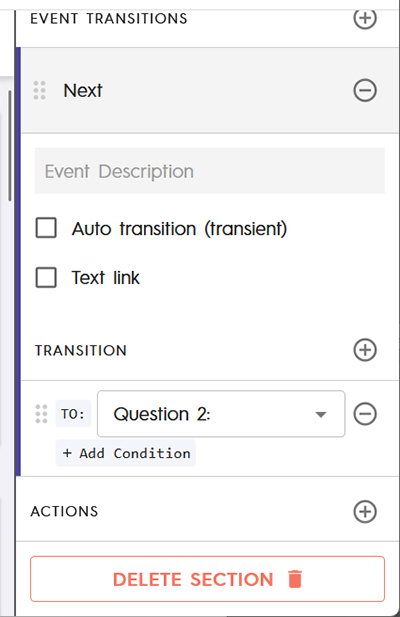
Note that by default, this button transitions to "Question 2" and has no conditions on it.
First, let us create a condition so that the participant will only be taken to Question 2 if they answer Question 1 with a "yes."
Click the + Add Condition item in the first Transition box. This will bring up the Event Transition Condition dialog box.
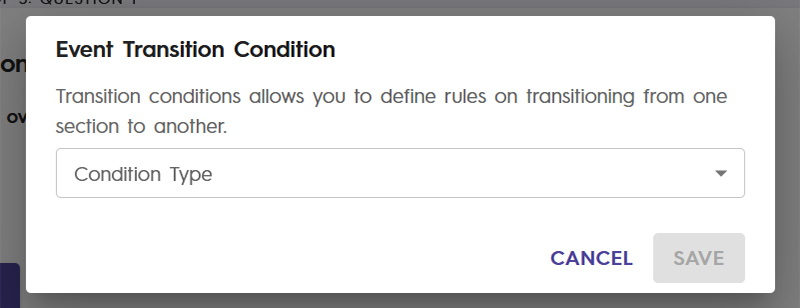
From the drop down menu, select Data Condition which will allow us to make decisions based on answers given to Chloe by the participant.

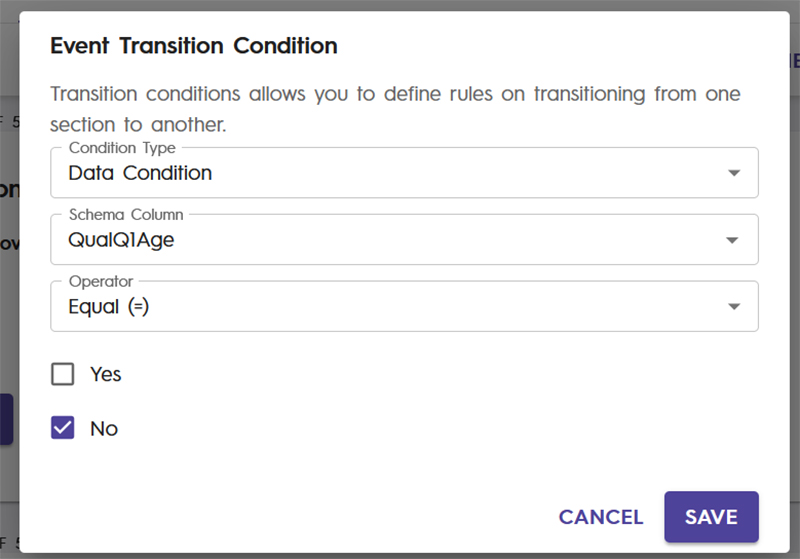
The dialog box that opens next is where you will configure the condition.

For this example, we want to select a User Field from the Schema Column drop down that we created earlier, which ties to the first question we have, and we will set its target value to yes.

Press Save to preserve the Transition you have configured.
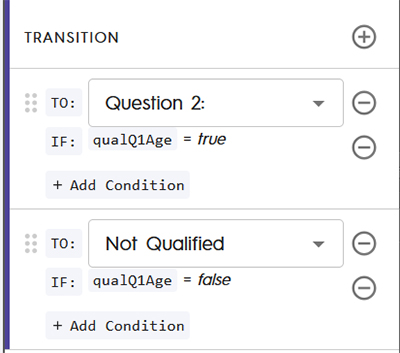
After Save has been pressed, the transition has been updated to reflect this new qualification logic we have defined.
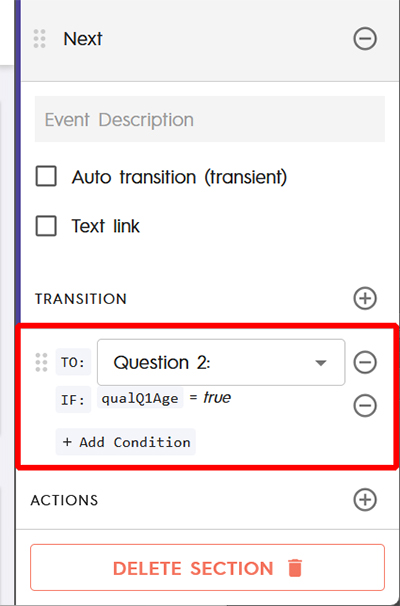
Pro-Tip: Test as you go! If you configure one transition, click the Preview button and walk through the questionnaire to make sure it is working as expected. Identify problems and fix them before moving onto the next transition. Building out all the transitions for your form THEN testing will make it harder to isolate or identify the problem.
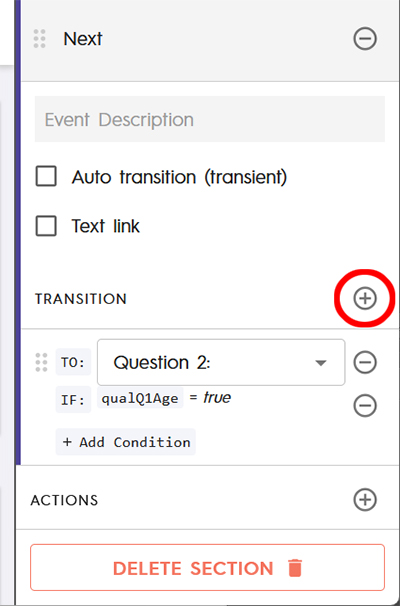
Click the + button to create another transition, one that will take us to the "Not Qualified" section if the participant answers this question with "no"
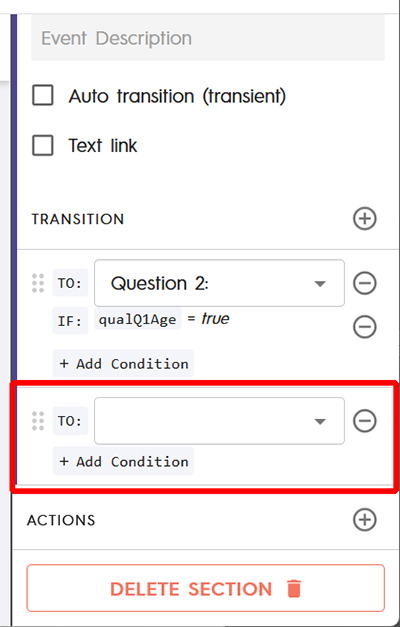
This creates a new Transition which now needs to be configured.
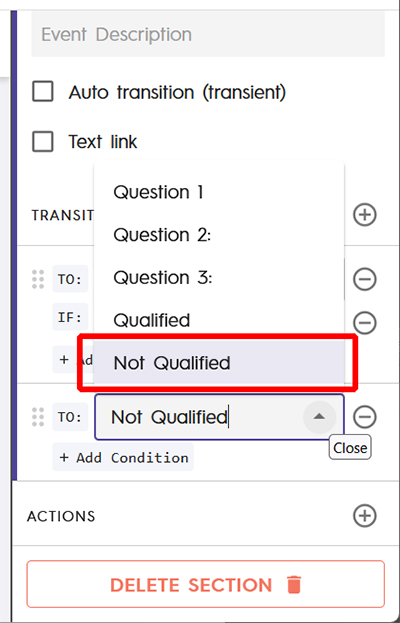
In the To drop down, select the Not Qualified section as your destination.
Click on the + Add Condition button, then configure your logic using the same method as the previous one. Your configuration dialog box should look something like this:
Save.
Your fully configured transitions for this form should look something like this:
Repeat this process for each Section of the Qualification Form, directing your participant either to the next question if they answered appropriately, or diverting them to the Not Qualified screen if they did not. Ensure that the final question, if answered correctly, transitions them to the Qualified section.
Option 2: Set-up qualification logic at the end of your studies Qualification Form by creating a Transition on the section containing your final question:
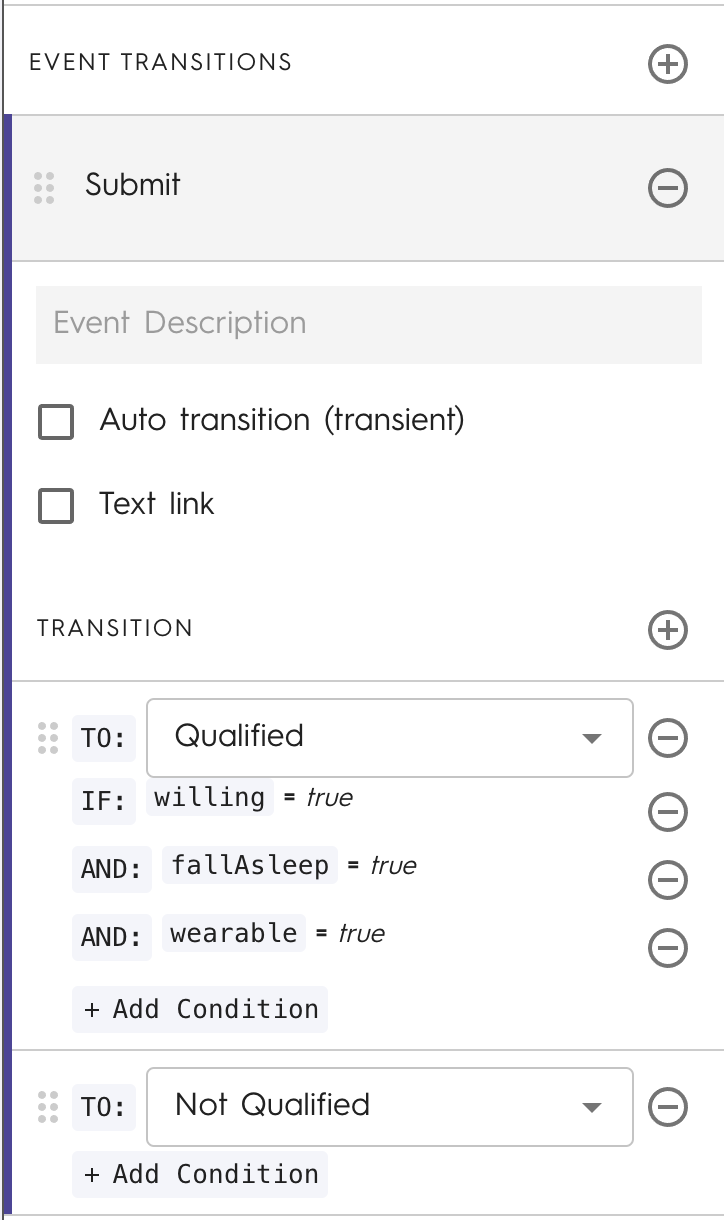
Create a button transition with a meaningful name such as "Submit".
In the transition settings, create qualification logic for each of the questions asked previously, using the Event Transition Condition dialog box described in Option 1.
For example, your criteria for Qualified might be:
willing = true AND
FallAsleep = true AND
wearable = true
If any of these conditions are false, your participant will be routed to Not Qualified without the need for any further logic.
These end-of-questionnaire transition configurations will look like this when done properly.
5. Link the Form to Your Study
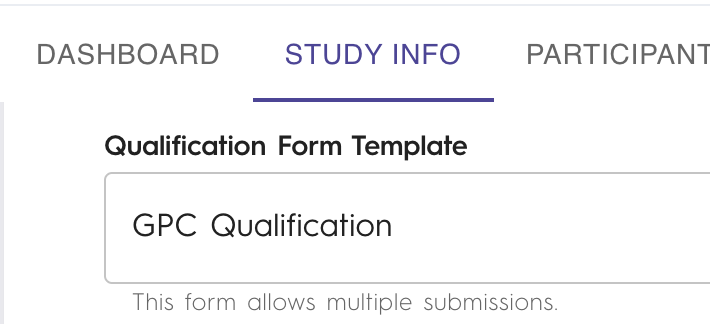
Go to Study Info tab in your Study.
Under Qualification Form Template, select the name of your qualification form.
Chloe will generate a Qualification Link URL in the Study Info section that you can share with prospective participants.

6. Track Participant Qualification Status
Monitor qualification outcomes in the Participants list within your study.
You can see which participants have been qualified or not based on their form responses.
Tip: For more detailed instructions on form building, refer to Intro to Form Building.