How To Add A Participant Manually To A Study
Last updated: December 19, 2025
During the course of your study, there may come a need to add a participant outside of the normal recruiting process. Perhaps you have finished recruiting, but then found a participant who is a great fit for the study, and you want to onboard them.
This article shows the step by step process for adding a study participant manually, then getting them started on their journey in the Chloe mobile app.
The process consists of the following steps:
Create the participant account.
Send the participant a study invite email.
Assign a study template to the participant account.
Good To Know: Creating a participant account using this method brings them into the study without completing the qualification questionnaire. You should manually confirm that a participant is qualified for your study before using this methodology.
Step 1 - Create The Participant account.
Log into the Chloe Admin Portal, select the target study, then navigate to the Participants tab.
Pro-Tip: Make sure your account type/role in Chloe empowers you to perform these functions. Use this link to see the list of Chloe User Roles and their available functions:📄 User Roles
Click the Add Participant button in the upper right hand corner.
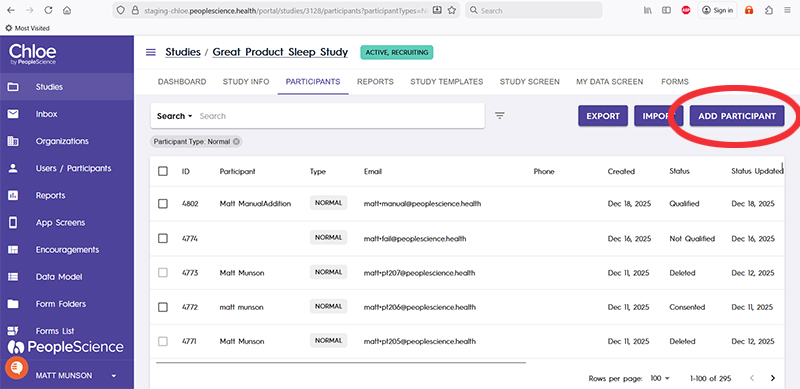
This will bring up the Create A Study Participant Dialog box.
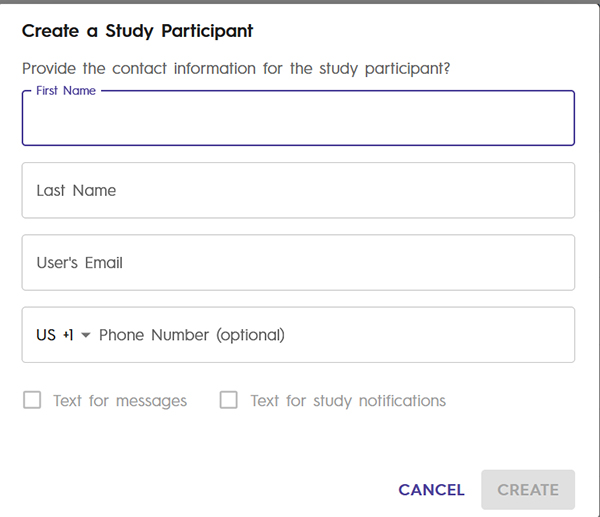
First name, Last name and User's Email are required fields. You can also enable Text for messages and Text for study notifications for your participant at this time, if they have provided a phone number. These can be modified later if needed.
Once you have entered all the necessary information, click the Create button to complete the process.
Step 2 - Send the participant a study invite email.
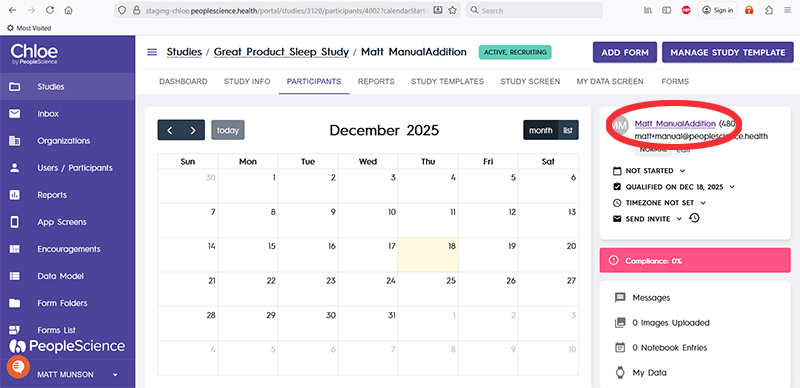
Find your newly created participant in the participants list and click on their line item to open their participant profile.
On their profile, click the link in the upper right hand corner.
This will take you to the User Attributes page for this participant, which includes an Info and Attributes tab.
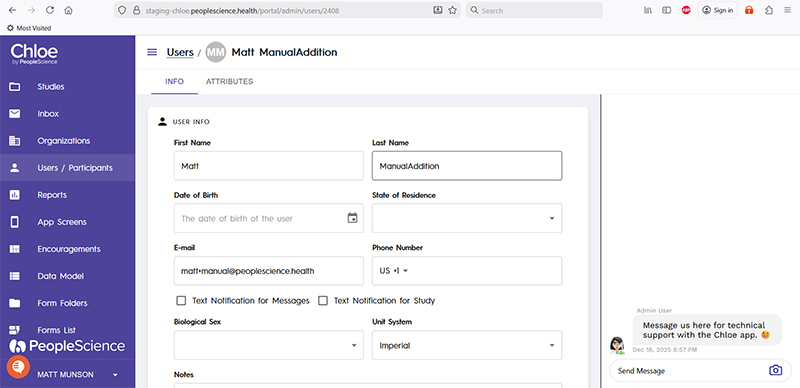
Scroll down on the Info tab until you see the section named User Portal Invite. Click on the button named Send Invite.
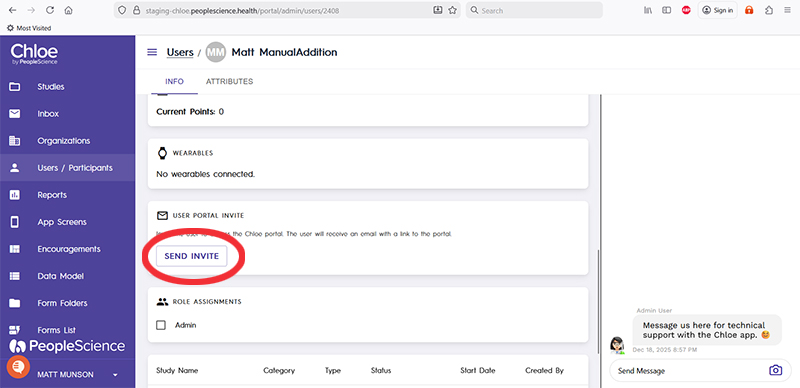
Once the button is clicked and Chloe processes the request, you will see a message on the info page that reads "User Portal Invite Sent." At this time, your participant will receive an email from Chloe with instructions on how to set up their password and download the Chloe Mobile App.
Step 3 - Assign A Study Template To the Participant Account.
You are now ready to start your participant on their study journey in Chloe. This is accomplished by assigning a study template to the participant.
Pro-Tip: Chloe will not allow a Study Template to be assigned to a participant until Study Notification Time has been set by the participant. This is done at the end of the Intake Form / Informed Consent Form in the Chloe Mobile App.
If your participant has not completed their intake form nor set their Study Notification Time, you will not be able to assign a Study Template to them.
Navigate to the participants profile and click on the button in the upper right hand corner named Manage Study Template.

This will bring up the Manage Study Template dialog box. Select the study template you wish to assign to this participant, and select a date that you would like it to become active. You can set it for today's date, or a date in the future.

Press Apply when you're done. The study template you selected is now applied to your participant.
Congratulations, you have now successfully added a participant to your study, and gotten them started.