Fitbit Wearable Integration Tutorial
Last updated: October 15, 2025
This article provides a step by step guide for setting up Fitbit wearable device integration on Chloe.
Good To Know: Chloe users can configure a wearable device whether they are participating in a study or not.
Step 1: Launch Chloe and access My Data
The My Data page can be accessed by clicking on the My Data button found at the bottom of the home screen on the Chloe mobile app.
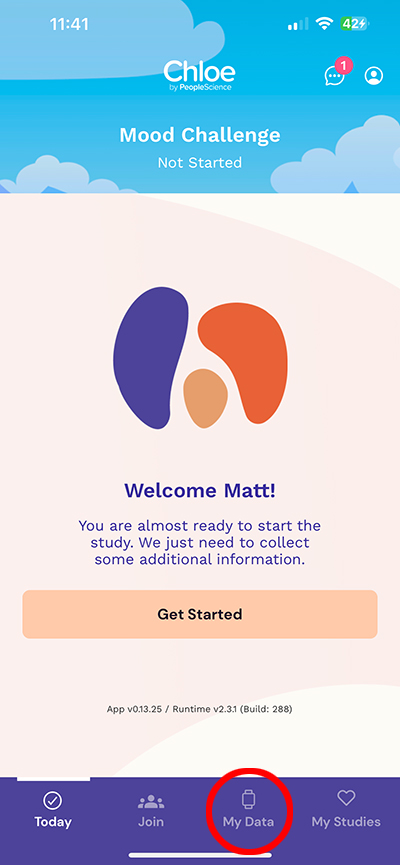
Once accessed, the My Data screen will present a list of wearable devices that Chloe is configured to integrate with.
Step 2: Select the device type you wish to integrate with.
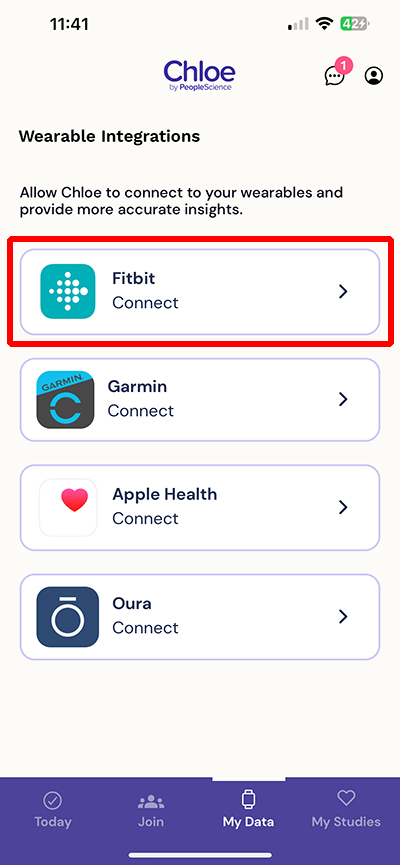
For this example, we are using Fitbit. Click on the Fitbit Connect button.
Pro-Tip: The steps for integrating all other devices will be similar to the ones in this tutorial.
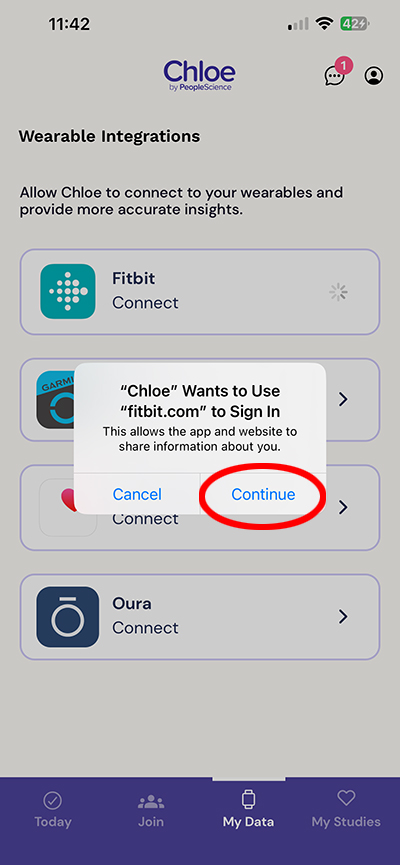
Your operating system may ask you whether or not you want to allow Chloe to access an external app. Press Continue to keep the process moving forward.
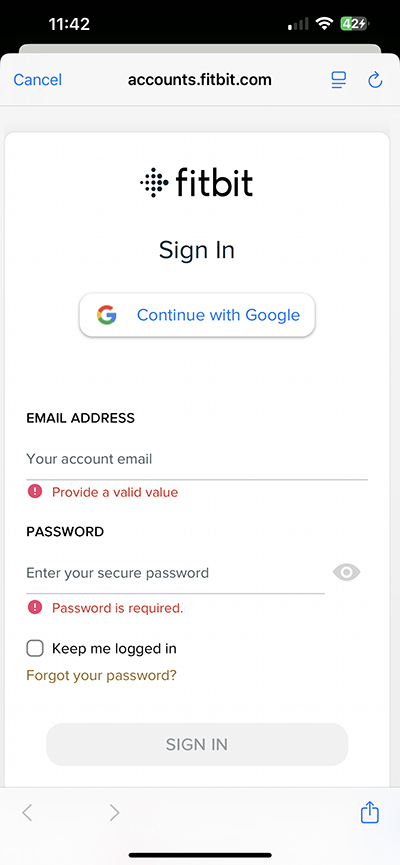
Step 3: Log into your devices application account and grant Chloe access to your data.
The interface and options may vary, but the goal is to enter your username and password.
Once you have entered a valid username and password combination, you will be prompted to select which data you would like Chloe to have access to. Once you have made your selections, press the Allow button.
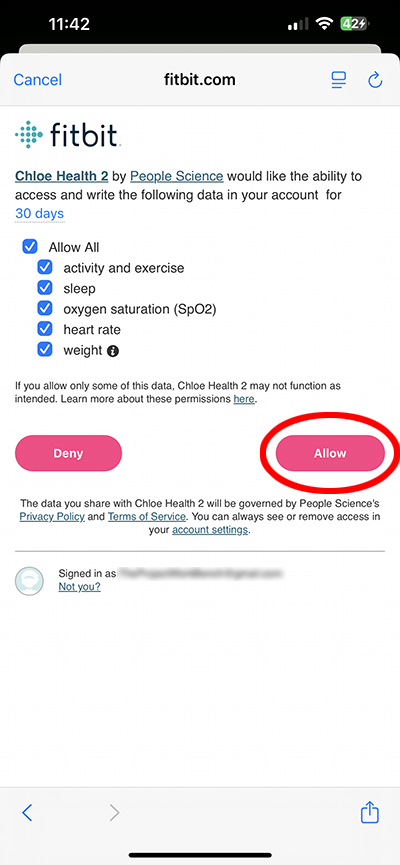
Chloe will then synchronize with your wearable app. This may take a moment to process.
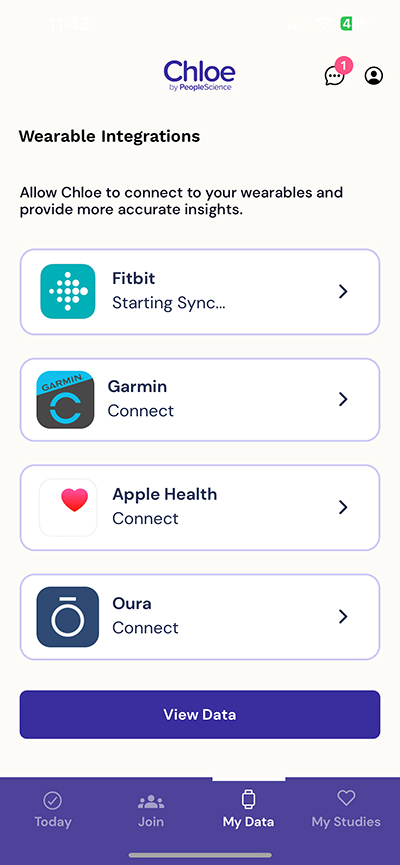
Step 4: View your data
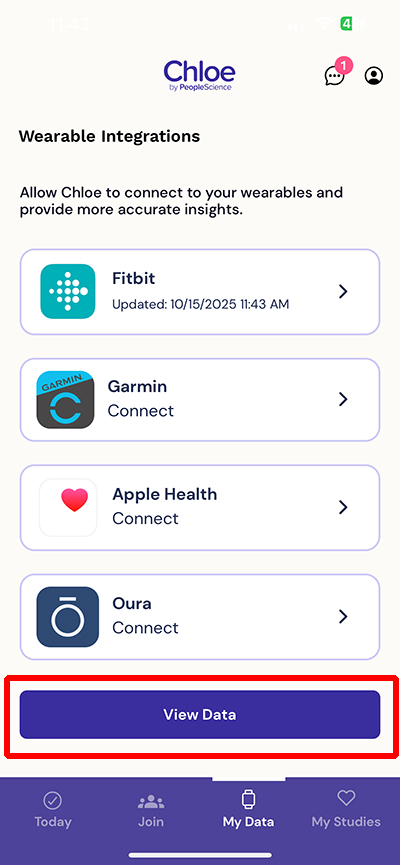
Once Chloe has finished connection, you can view the data that has been made available. Click on the View Data button at the bottom of the screen.
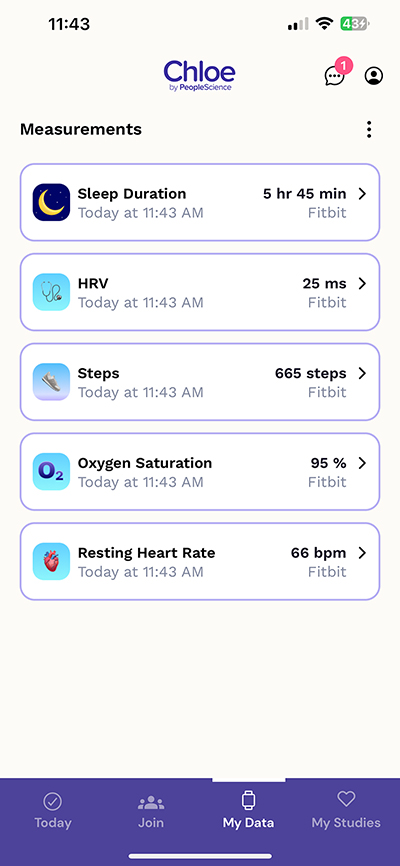
Below is a sample of what data might look like in the My Data section of Chloe. Your study might be configured to show different data, and present it in different ways. The screen shot below is the out of the box configuration for a Chloe user who is not currently participating in a trial.
For more information on configuring how wearables data can be displayed to a study participant, please see this article: 📄 My Data - Participant Data Screen